EC2 Scripts
The primary (and only) EC2 script is */ec2/uw-ec2.py. Here we describe it in some detail.
Upon launch, the script assigns the tags cluster and master to spot requests, instances, and EBS volumes. cluster is the cluster's name, while master is a boolean (True or False) indicating whether or not the resource is the master's.
For n slave machines, if n is 4, 8, 16, 32, 64, or 128, the cluster names are cloud, cld, cw, cx, cy, cz respectively. For all other values, the cluster name is c<n>x. For example, c10x for 10 slaves.
When init is used, the script assigns a name tag to the instances and EBS volumes. The master has <cluster-name>0, while slaves have <cluster-name>i for i ranging from 1 to n. For example, the cluster cw is tagged with cw0 for the master, and cw1, cw2, ..., cw16 for the slaves.
To find instances in the EC2 console, enable the cluster, master, and name tags:

Alternatively, directly filter for them using "Search Instances".
If you ever need to tag an instance manually to follow the conventions, do so via Instances:

Here we detail how to manually obtain the results that are automated by the script. As well, options for uw-ec2.py are highlighted in [...]s.
-
Go to the EC2 console and ensure that you are in us-west-2.
-
Select Key Pairs in the sidebar.
-
Create and save the
.pemkey to your local machine.
Note: We recommend using uwbench as the key name and saving it to */ec2/uwbench.pem. These are the defaults assumed by uw-ec2.py.
-
Go to the EC2 console and select Security Groups.
-
Click on "Create Security Group" and choose inbound settings as pictured:

Note: Like with the key pair, uwbench is the default name assumed by uw-ec2.py.
We'll go over how to launch spot instances: on-demand differs by one check box (see step 3).
First, select Spot Requests from the sidebar and click "Request Spot Instances".
- Select an AMI by searching for "uw-master" or its AMI image ID (see
AMI_MASTERin uw-ec2.py).

[--ami-master specifies the master's AMI image.]
- Select "All generations" and choose m1.xlarge as the instance type.

[-t or --instance-type specifies the instance type.]
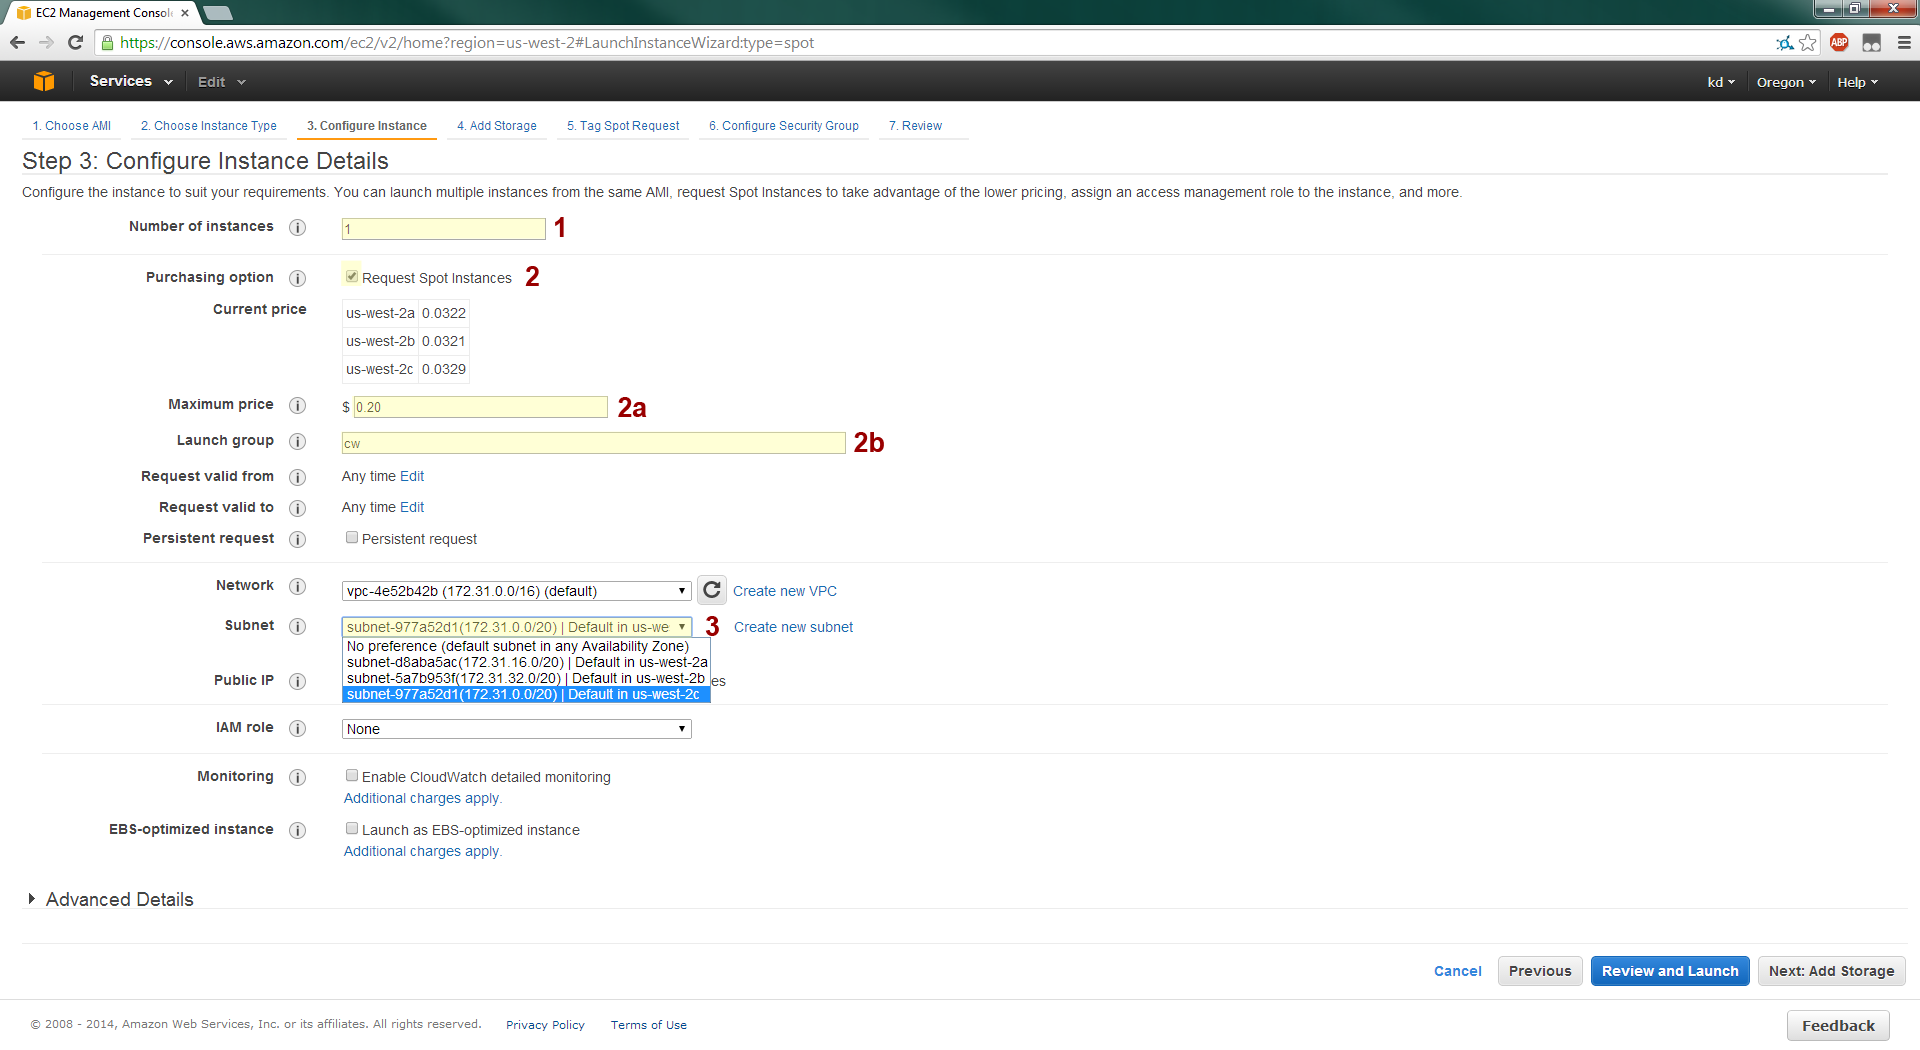
- 1. "Number of instances" is just 1 for the master.
- 2. Check "Request Spot Instances" to get spot instances.
- 2a. For spot instances, specify a maximum price ($ per hour per instance).
- 2b. Also specify the launch group---this should be the cluster's name!
- 3. Select us-west-2c for the availability zone.
[-p or --spot-price specifies the spot price, -z or --zone specifies the availability zone.]
- Specify (1) the size of the master's volume (see Resizing Cluster Volumes) and (2) whether you want the master's volume to be deleted automatically upon termination (also see Terminating EC2).

[--size-master sets the master volume's size, --persist-master-vol is equivalent to unticking the check box.]
Note: For spot instances, you may want to uncheck the box so that you don't lose your log files/results when your master gets terminated due to price spikes.
- Assign the appropriate tags, following Tagging Conventions, so that
uw-ec2.pyworks correctly when/if you ever need it.
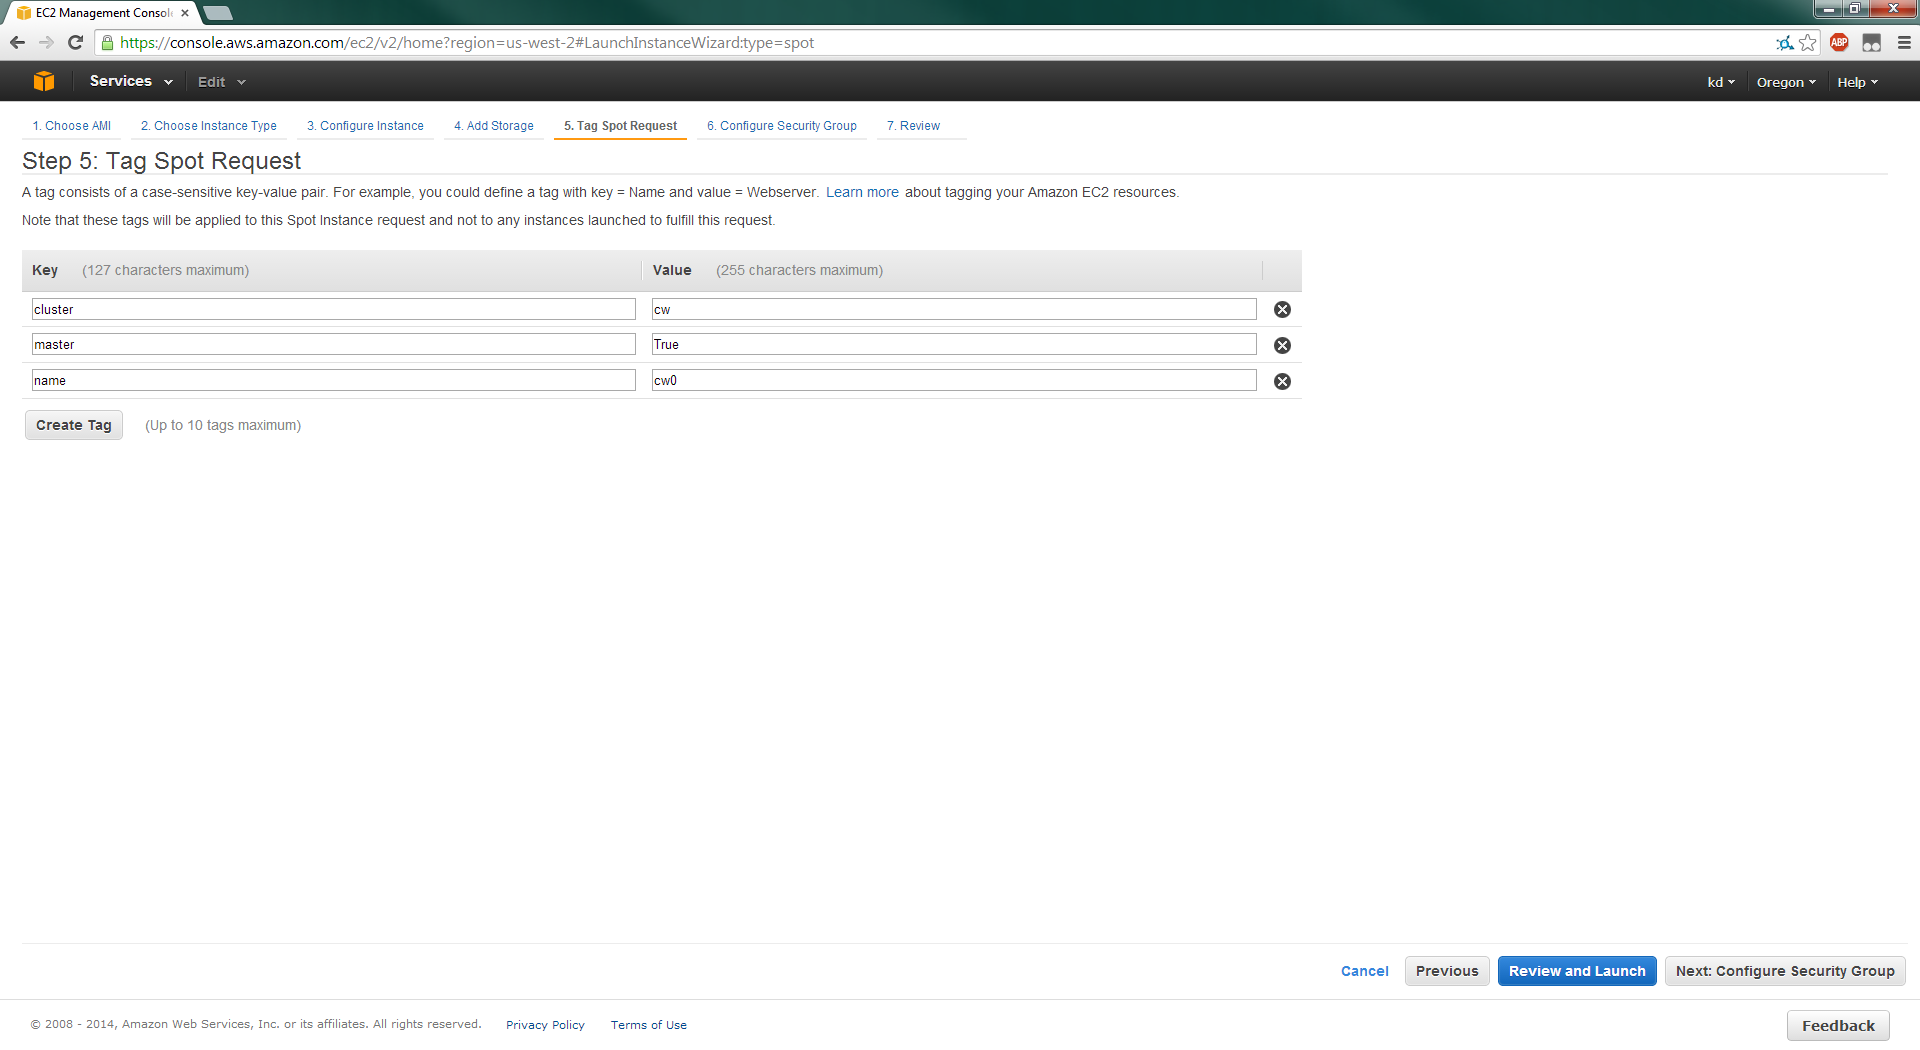
Note: If this is a spot request, this will NOT tag the instance that is created! So you must do that manually too. Furthermore, this does not tag the associated EBS volume.
- Assign the appropriate security group.
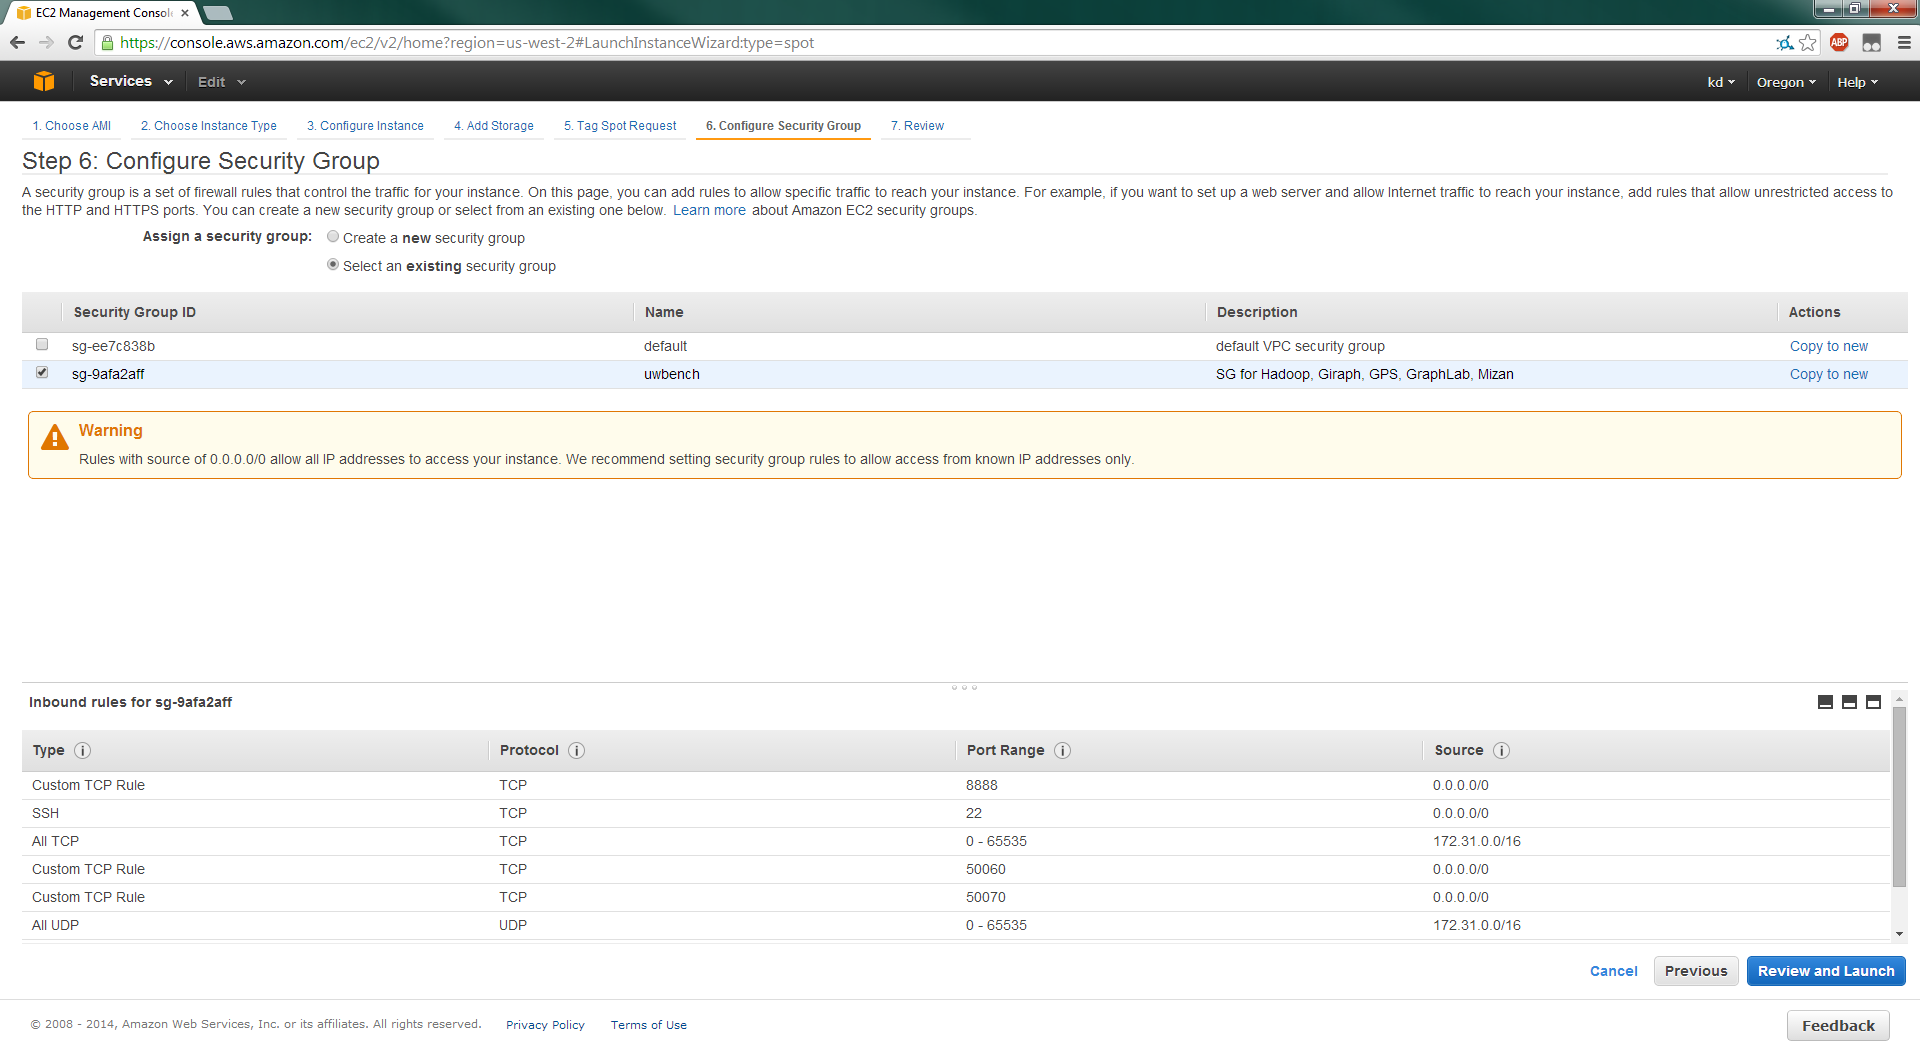
[-g or --security-group specifies the security group name.]
- Double check the configuration details and launch. Be sure to select the correct key pair!

[-k or --key-pair specifies the key-pair to associate instances with.]
Now monitor the EC2 Dashboard, Instances, or filter for "Open" requests in Spot Requests. to wait for the spot requests to be granted and the instances to start.
Starting the slave instances is similar to starting the master.
- Select an AMI by searching for "uw-slave" or its AMI image ID (see
AMI_SLAVEin uw-ec2.py).

[--ami-slave specifies the slave's AMI image.]
-
Same as the master.
-
The options for the slaves differ slightly:

- 1. "Number of instances" is the number of slaves to launch.
- 2. Same as the master. Ensure that the launch group matches the master's!
- 3. Same as the master. Ensure the availability zone matches the master's!
[-n or --num-slaves specifies the number of slave machines.]
- Same as the master. Note that
uw-ec2.pyhas no option to disable "Delete on Termination" for slaves' EBS volumes.
[--size-slave sets the slave volume's size.]
- Like the master, assign the appropriate tags following Tagging Conventions.

Note: Unlike the master, there is no easy way to tag each instance's name separately. However, cluster and master is all that's needed for uw-ec2.py to work correctly. Again, this does not tag EBS volumes (nor instances if the tags are for spot requests.)
-
Same as the master.
-
Same as the master.