![]()
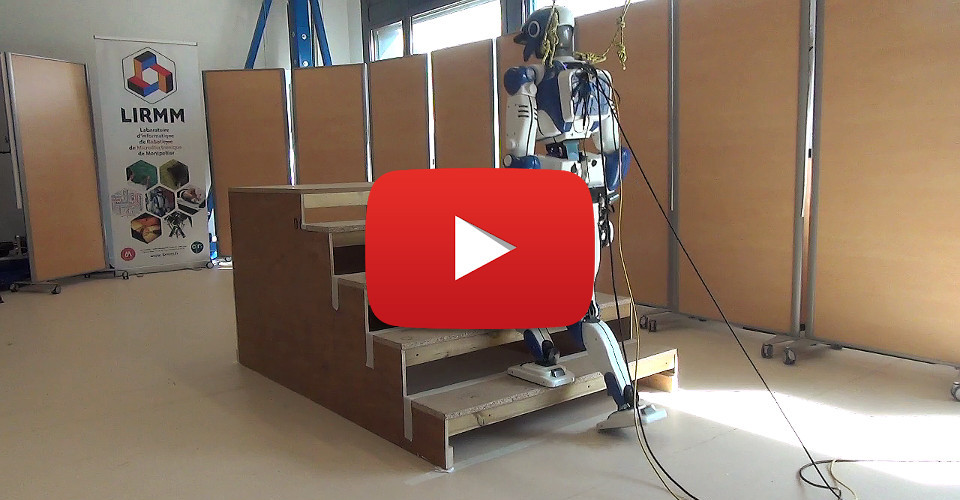
For technical details, please refer to the following work: Stair Climbing Stabilization of the HRP-4 Humanoid Robot using Whole-body Admittance Control. If you use the project in your own work, please cite the paper as follows:
@inproceedings{caron2019stair,
  title={Stair climbing stabilization of the HRP-4 humanoid robot using whole-body admittance control},
  author={Caron, St{\'e}phane and Kheddar, Abderrahmane and Tempier, Olivier},
  booktitle={2019 International conference on robotics and automation (ICRA)},
  pages={277--283},
  year={2019},
  organization={IEEE}
}
This project has been used in the following work, and much more:
- Humanoid robots in aircraft manufacturing: The airbus use cases: HAL paper - IEEE paper and video - Best paper award.
@article{kheddar2019humanoid,
  title={Humanoid robots in aircraft manufacturing: The airbus use cases},
  author={Kheddar, Abderrahmane and Caron, St{\'e}phane and Gergondet, Pierre and Comport, Andrew and Tanguy, Arnaud and Ott, Christian and Henze, Bernd and Mesesan, George and Englsberger, Johannes and Roa, M{\'a}ximo A and others},
  journal={IEEE Robotics \& Automation Magazine},
  volume={26},
  number={4},
  pages={30--45},
  year={2019},
  publisher={IEEE}
}
- A Cross-Temporal Robotic Dance Performance: Dancing with a Humanoid Robot and Artificial Life - video excerpt - full video - CDADance controller
- Trying the controller
- Building with mc-rtc-superbuild
- Usage
- Documentation
- External Footstep Planner
- Integrate your own robot
- Integrating in other controllers
- Thanks
You can try a snapshot of the controller directly by running its Docker image.
xhost +local:docker
docker run -it --rm --user ayumi -e DISPLAY=${DISPLAY} -v /tmp/.X11-unix:/tmp/.X11-unix:rw \
    stephanecaron/lipm_walking_controller \
    lipm_walking --floor
This image runs the exact controller we used in 2019 during experiments and industrial demonstrations. Replace --floor with --staircase for stair climbing.
You may also try a version of the controller without dynamic simulation using our online web demo.
The recommended way to build this project is to use mc-rtc-superbuild along with the extension for LIPM walking controller provided in superbuild-extensions.
git clone --recursive https://github.com/mc-rtc/mc-rtc-superbuild.git
cd extensions
git clone --recursive https://github.com/mc-rtc/superbuild-extensions.git
echo "set(EXTENSIONS_DIR ${CMAKE_CURRENT_LIST_DIR}/superbuild-extensions)" > local.cmake
# Install LIPM walking controller and its dependencies
echo "include(${EXTENSIONS_DIR}/controllers/lipm_walking_controller.cmake)" >> local.cmake
# For dynamics simulation with MuJoCo
echo "include(${EXTENSIONS_DIR}/simulation/MuJoCo.cmake)" >> local.cmake
echo "include(${EXTENSIONS_DIR}/gui/mc_rtc-magnum.cmake)" >> local.cmake
cd ..
# Configure the superbuild and install all required system dependencies
cmake --preset relwithdebinfo
# Clone all projects and their dependencies, and build them
# Note by default this will create a workspace folder in the parent directory
# If you wish to change the path or default options, edit CMakePresets.json or create your own preset in CMakeUserPresets.json
cmake --build --preset relwithdebinfo- To run the controller with MuJoCo simulation use
mc_mujoco -f ~/lipm_walking_controller/etc/mc_rtc.yaml- To run the controller in ticker mode (no physics simulation) use:
mc_rtc_ticker -f ~/lipm_walking_controller/etc/mc_rtc.yamlYou can modify this file to run with a different supported robot.
- To visualize the controller with ROS (rviz):
ros2 launch mc_rtc_ticker display.launchor alternatively if you have built mc_rtc without ROS support you can use the standalone mc-rtc-magnum standalone visualizer:
mc-rtc-magnumAlternatively, you can use the choreonoid simulator to run the controller.
While you can make it work with any robot, the setup process is tricky and outside the scope of this README.
For users with the appropriate access (AIST and LIRMM members), we provide a docker image pre-configured with choreonoid, mc_udp and all robots supported within the organization.
To use it:
- Add
mc_udpto the superbuild extensions inextensions/local.cmake:
AddProject(
  mc_udp
  GITHUB jrl-umi3218/mc_udp
  GIT_TAG origin/master
  DEPENDS mc_rtc
  APT_PACKAGES libmc-udp-dev python-mc-udp python3-mc-udp mc-udp-control
  CMAKE_ARGS -DBUILD_OPENRTM_SERVER=OFF -DBUILD_MC_RTC_CLIENT=ON
)-
Login to github container registry using a personal access token with
read:packagesscope. You can find instructions on how to do this here.export CR_PAT=your_personal_access_token echo $CR_PAT | docker login ghcr.io -u USERNAME --password-stdin
-
Pull the docker image:
docker pull ghcr.io/isri-aist/choreonoid-private:jammy-standalone-release-latest
docker tag ghcr.io/isri-aist/choreonoid-private:jammy-standalone-release-latest choreonoid-latest- Run choreonoid from the docker container:
xhost +local:docker # allow X-server connections from docker containers
docker run -it -e DISPLAY=${DISPLAY} -v /tmp/.X11-unix:/tmp/.X11-unix:rw choreonoid-latest
docker run -it -e "DISPLAY=${DISPLAY}" -v "/tmp/.X11-unix:/tmp/.X11-unix:rw" --network=host choreonoid-latest
# within the container type help for instructions
# for example to run the simulation with the RHPS1 robot, run:
run_choreonoid RHPS1 sim_mc_udp.cnoid- On your local machine, run the
mc_udpclient to connect to the docker container:
MCUDPControl -f ~/lipm_walking_controller/etc/mc_rtc.yamlNOTE: Only the choreonoid scripts running mc_udp server can be used. choreonoid runs isolated within the docker container but shares its network with the host machine. The mc_udp client connects to the server running in the docker container, allowing you to control the robot and visualize it in rviz or mc-rtc-magnum.
To use the controller, go to the Walking tab in the GUI. Click on the Start standing button (enables stabilization), select a walking plan amongst the default ones, or use the custom plan and move its target using the provided marker. Click on the Start walking button to start walking. You can also use the Stop walking button to stop the robot.
You can refer to the archived How to use the graphical user interface of @stephane-caron for screenshots and more details on how to use the GUI.
For documentation, you can refer to the following resources:
- The Doxygen documentation includes some basic tutorials. This is slightly outdated, but still relevant for the most part.
- @stephane-caron's archived wiki. While archived it remains relevant for the most part.
The controller can be used with an external footstep planner through the provided ExternalFootstepPlannerPlugin. This can be used to provide additional capabilities such as path planning and collision avoidance, or to control walking using a joystick.
Supported planners are:
- Hybrid MPC Footstep Planner : recommended, built by default
- Online Footstep Planner : deprecated, ROS1 only. Refer to for more (deprecated) information on how to use it.
To use it, select the external plan in the GUI, and then select the planner you want to use.
Adding your own robot is fairly straightforward. You need to:
- Have the robot already integrated in
mc_rtc(see this tutorial) - Add robot-specific configuration files to your robot module You need:
- Modify
etc/controllers/LIPMWalking/<robot_name>.yamlwith content
robot_models:
  <robot_name>: # This should be the name of your robot, for example: hrp2_drc, hrp4cr, etc.
    swingfoot:
      weight: 2000
      stiffness: 500
    # A default configuration is loaded from the robot module
    # You may overwrite some parameters here. For supported options, see
    # See https://jrl-umi3218.github.io/mc_rtc/json-full.html#MetaTask/LIPMStabilizerTask
    # For example:
    stabilizer:
      dcm_tracking:
        gains:
          prop: 4
          integral: 20
          deriv: 0.5
      admittance:
        cop: [0.02, 0.01]
      tasks:
        contact:
          damping: 300.
      dcm_bias:
        biasDriftPerSecondStd: 0.0001
        withDCMBias: true
    sole:
      half_length: 0.108
      half_width: 0.07
      friction: 0.7
plans:
  <robot_name>: # Replace with your robot name
    ashibumi: # stepping in place
      double_support_duration: 0.2
      single_support_duration: 0.8
      swing_height: 0.04
      contacts:
        - pose:
            translation: [0.0, -0.105, 0.0]
          surface: RightFootCenter
        - pose:
            translation: [0.0, 0.105, 0.0]
          surface: LeftFootCenter
        - pose:
            translation: [0.0, -0.105, 0.0]
          surface: RightFootCenter
        - pose:
            translation: [0.0, 0.105, 0.0]
          surface: LeftFootCenter
        - pose:
            translation: [0.0, -0.105, 0.0]
          surface: RightFootCenter
        - pose:
            translation: [0.0, 0.105, 0.0]
          surface: LeftFootCenter
        - pose:
            translation: [0.0, -0.105, 0.0]
          surface: RightFootCenter
        - pose:
            translation: [0.0, 0.105, 0.0]
          surface: LeftFootCenter
        - pose:
            translation: [0.0, -0.105, 0.0]
          surface: RightFootCenter
        - pose:
            translation: [0.0, 0.105, 0.0]
          surface: LeftFootCenter
        - pose:
            translation: [0.0, -0.105, 0.0]
          surface: RightFootCenter
        - pose:
            translation: [0.0, 0.105, 0.0]
          surface: LeftFootCenter
# ... other plans- Install this file, add the following lines to your
CMakeLists.txt:
install(FILES etc/controllers/LIPMWalking/<robot_name>.yaml
DESTINATION ${MC_CONTROLLER_RUNTIME_INSTALL_PREFIX}/LIPMWalking/)- Additionally, you will need to tune the stabilizer gains for your robot. See Tuning the stabilizer for more information. The tuning can be done live from the GUI in the
Stabilizertab. You can export a yaml representation of this configuration from here, and add it to your robot module's_lipm_stabilizerconfiguration file, or to the aboverobot_modelssection in theetc/controllers/LIPMWalking/<robot_name>.yamlfile. The most important gains are thedcm_trackingPID (dcm control) and the foot admittance gains (force control)
robot_models:
  <robot_name>: # This should be the name of your robot, for example: hrp2_drc, hrp4cr, etc.
    # <YOUR CUSTOM CONFIGURATION>
    # For supported options, see
    # See https://jrl-umi3218.github.io/mc_rtc/json-full.html#MetaTask/LIPMStabilizerTask
    # For example:
    stabilizer:
      dcm_tracking:
        gains:
          prop: 4
          integral: 20
          deriv: 0.5
      admittance:
cop: [0.02, 0.01]To integrate LIPMWalking into your own controllers, you need to:
- Modify
- Have your
Controllerclass inherit frommc_control::LIPMWalkingController - Modify your
CMakeLists.txtto link against the LIPM walking controller library:
find_packagje(lipm_walking_controller REQUIRED)
target_link_libraries(${PROJECT_NAME} PUBLIC lipm_walking_controller::lipm_walking_controller)- Add LIPMWalking states to your controller's FSM configuration
StatesLibraries:
- "@MC_STATES_DEFAULT_RUNTIME_INSTALL_PREFIX@"
- "@MC_STATES_RUNTIME_INSTALL_PREFIX@"
- "@LIPM_WALKING_STATES_LIBRARIES@"
StatesFiles:
- "@MC_STATES_DEFAULT_RUNTIME_INSTALL_PREFIX@/data"
- "@MC_STATES_RUNTIME_INSTALL_PREFIX@/data"
- "@LIPM_WALKING_STATES_FILES@"- Add a walking FSM state to your controller's FSM configuration
LIPMWalking::WalkInternal:
  base: Meta
  transitions:
  - [LIPMWalking::Standing, DoubleSupport, LIPMWalking::DoubleSupport]
  - [LIPMWalking::DoubleSupport, SingleSupport, LIPMWalking::SingleSupport]
  - [LIPMWalking::DoubleSupport, Standing, LIPMWalking::Standing]
  - [LIPMWalking::SingleSupport, DoubleSupport, LIPMWalking::DoubleSupport]
  configs:
    LIPMWalking::Standing:
      autoplay: false
autoplay_plans: [external]- Put this FSM in parallel to other actions of your controller
WalkAndOtherActions:
  base: Parallel
  states:
    - LIPMWalking::WalkInternal:
    - OtherState1:
    - ...
See https://github.com/arntanguy/CDADance and https://github.com/isri-aist/mc_ana_avatar_controller for examples of how to integrate LIPMWalking in your own controllers.
Special thanks to:
- @stephane-caron for developing the original version of this controller, and maintaining it for several years
- @gergondet for developing and helping with mc_rtc and maintaining this project
- @arntanguy for developing and helping with mc_rtc and maintaining this project
- @Saeed-Mansouri for bug hunting and discussion around the project - Best Debugger Award 🏅
- @mmurooka for bug hunting and discussion around the project
- @mehdi-banallegue for his work on maintaining and improving the stabilizer
- @TsuruMasato for his work regarding the Online Footstep Planner integration