[TOC]
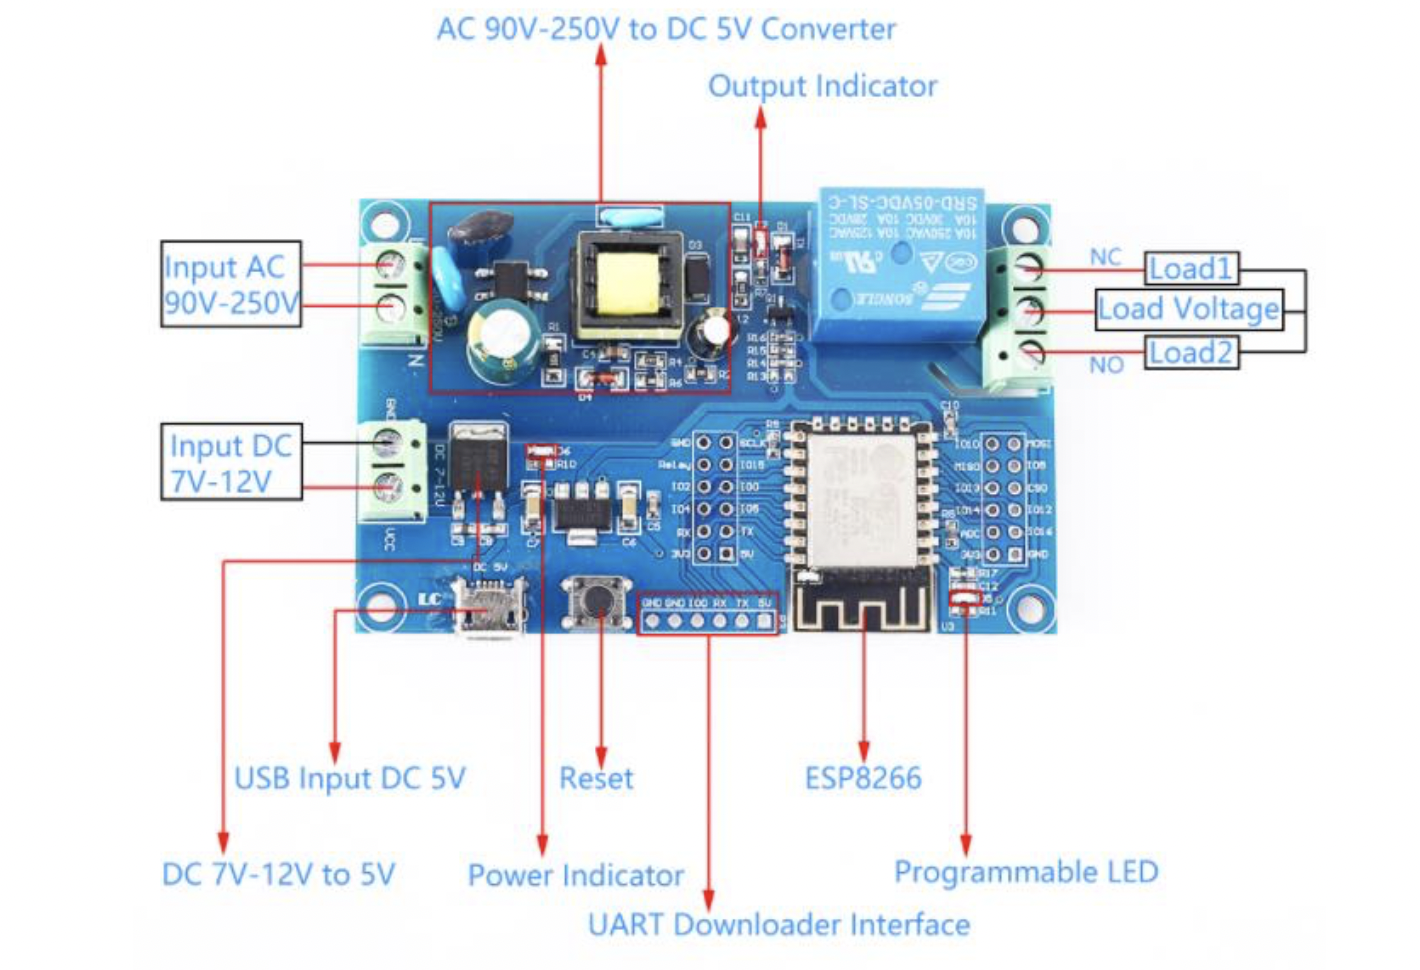
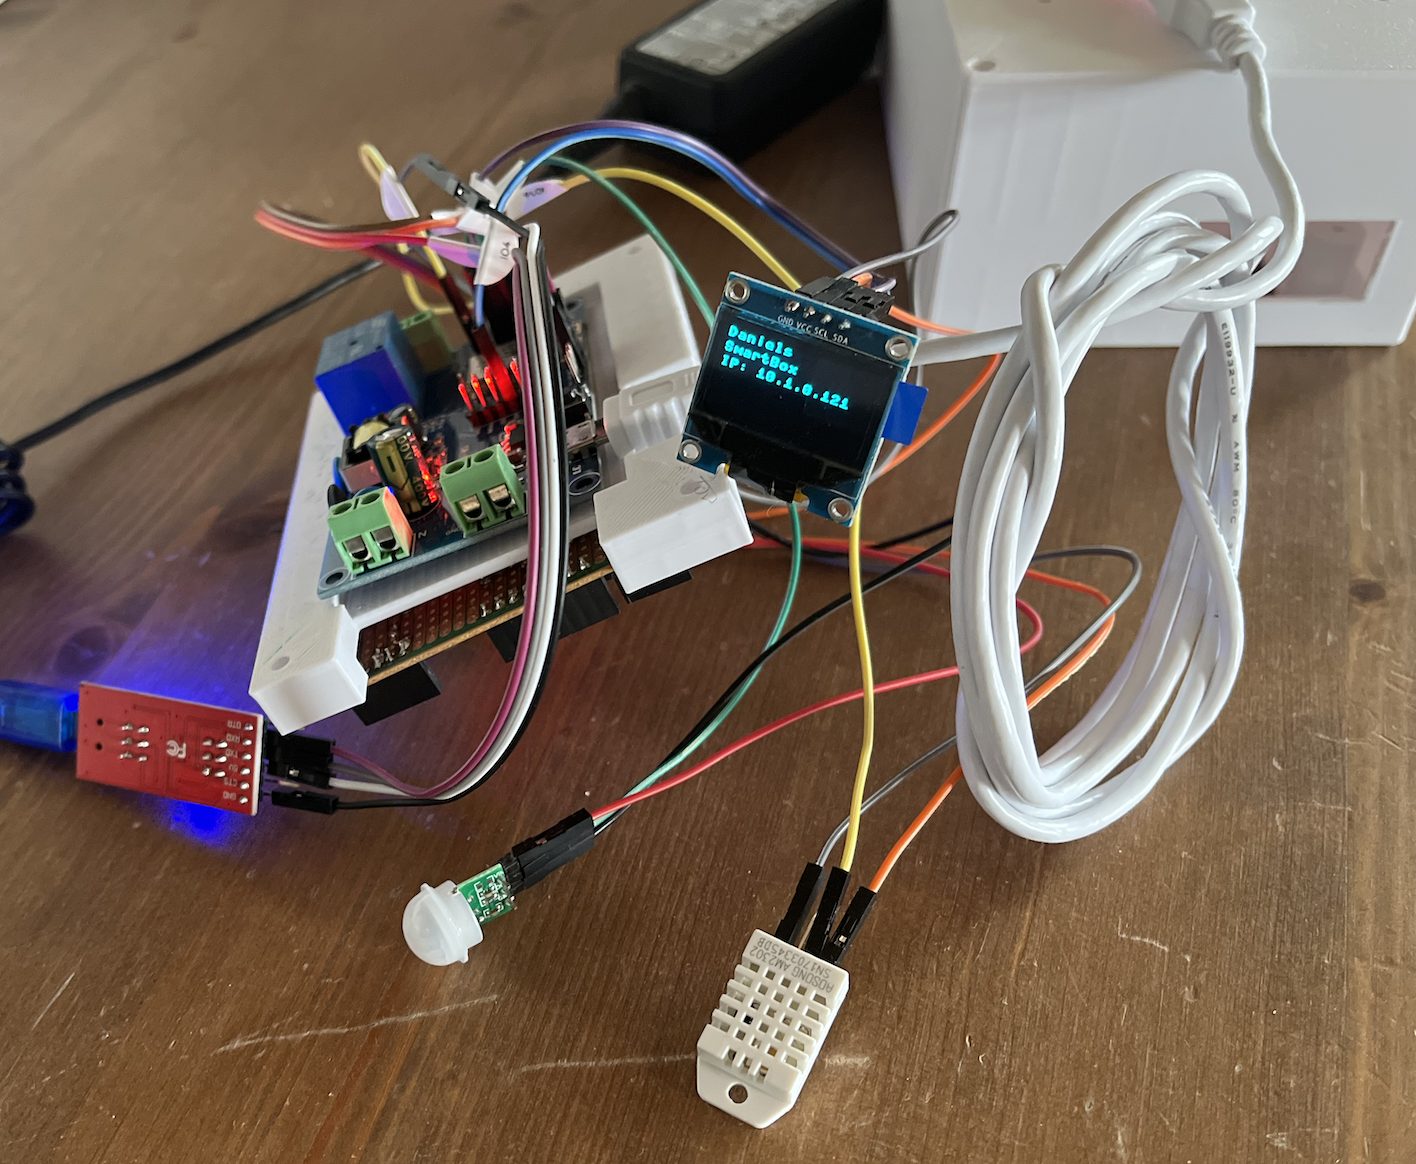
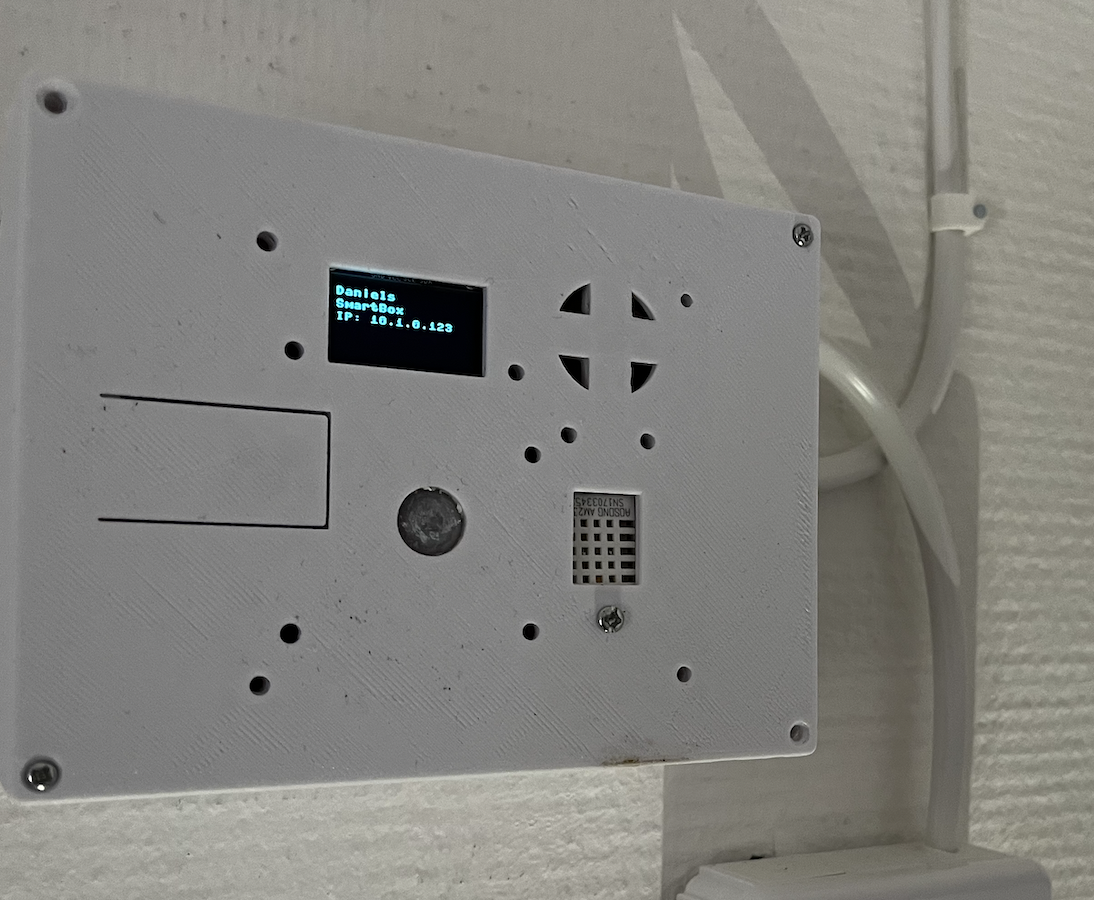
Found good need for monitoring of motions.. 🚨.. temperature/humidity 🌡 and smoke 🔥 in case of fire within out shed, so thank to an ESP8266 relay board such as this one allowed me write some Micropython code to allow display this to an OLED display and at the same time allow send data back to MQTT used by home automation .. and a small web-service allowing one to read sensor values as HTML or JSON.
Including a button, to allow switch between sensors and control the relay.. so to make all of this to work it'd had to be written using async/await methods.
I forgot once again the limitations such memory in ESP8266 (just around 35KB ram) that turned out to be a problem involving that much code to be run in such way that the interpreter required to compile within RAM so eventually freezing this assured leaving around 20KB when code being run .. ruins the workflow a little bit with the inconvinience with using the cross-compiler and flash the firmware... but again, it is quite impressive what one are able to squeeze into there tiny inexpensive things.. I made some notes how I did freeze the code and flashed this using my environment together with some internal tips and tricks mainly for my own memory.
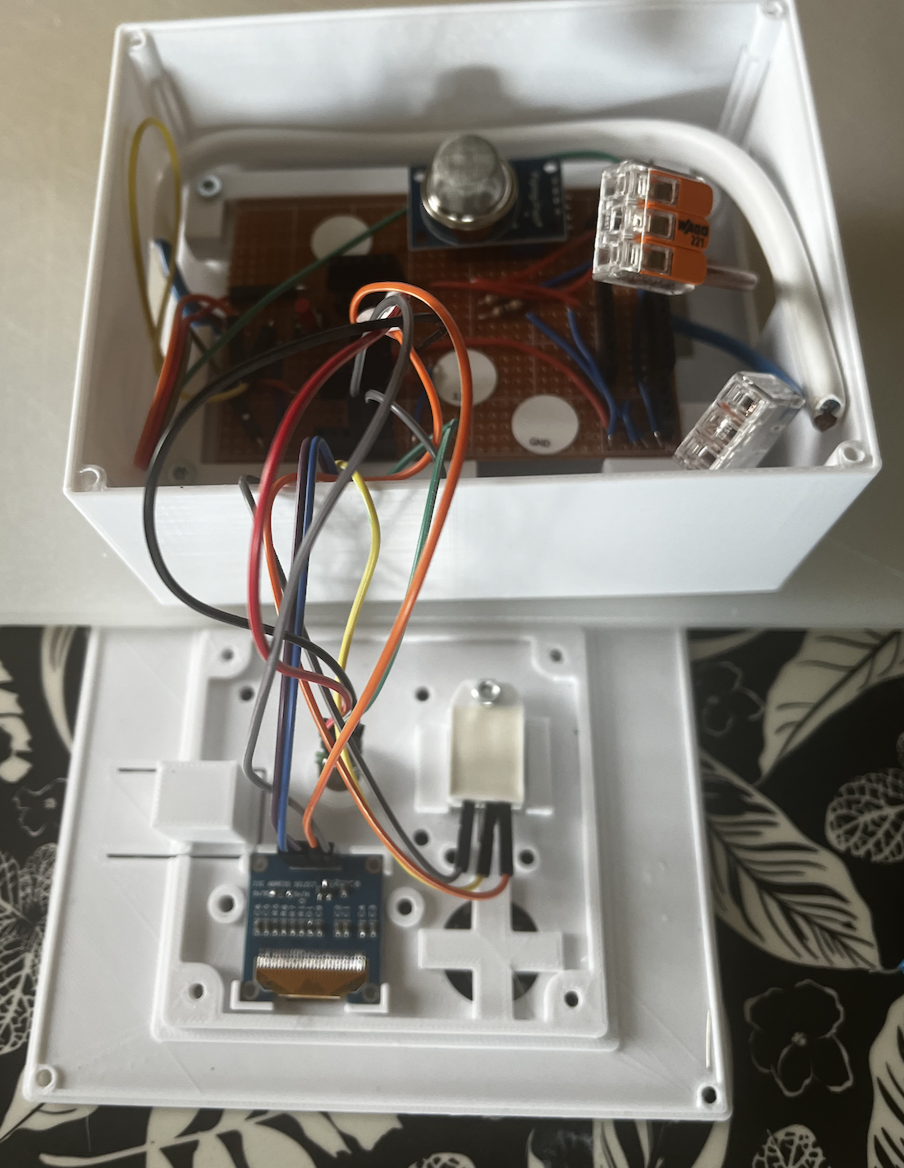
So the hardware eventually used were following ..
- ESP8266 Wifi Relay such as this
- DHT-22
- MQ2 smoke sensor
- PIR-sensor
- SSD1306 OLED display
- button/switch
Figuring out those PIN's were not that obvious since not all GPIO's are suitable as output/input, as I recall the I2C was the biggest challenge and eventually managed to get everything organised and working but using every single GPIO..
Also while flashing the board IO0 had to be put to GROUND which I at first failed by figuring out that the pin soldered to the GND I used was not properly soldered that caused me some trouble before understanding that was the issue.
| Relay board GPIO | Comment | Component Pin |
|---|---|---|
| 2 | ok out | |
| 4 | ok in/out | OLED (SDA) |
| 5 | internally used for relay | |
| 9 | was not okay either | |
| 10 | ok in (set to PULL_UP) | Button |
| 12 | ok in/out | |
| 13 | ok in/out | PIR |
| 14 | ok in/out | OLED (SCL) |
| 16 | ok in | DHT22 |
For the MQ2 sensor to driven by 5v but ESP8266 expect 3.3v I had to use a voltage divider of 1000 ohm and 220 ohm that turned out well.
This is an overview of the relationship between classes written in the Micropython source code.
classDiagram

entrypoint ..> MyController : uses
entrypoint ..> webrepl : uses
entrypoint ..> wifi : uses

MyController o-- MyButton : Aggregation
MyController o-- WDT : Aggregation
MyController o-- MySmoke : Aggregation
MyController o-- MyPir : Aggregation
MyController o-- MyDisplay : Aggregation

MyButton ..> MyDisplay

MQTTClient <.. MySmoke
MQTTClient <.. MyPir
MQTTClient <.. MyTemp

class MyTemp {
pin: int
read_temp()
read_humd()
}

class MyButton {
pin: int
event_loop: obj
+add_event() }

class WDT { timeout: str }

class MySmoke {
pin: int
read_smoke()
}

class MyPir {
pin: int
event_loop: obj
read_motion()
}

class MyDisplay {
sda_pin: int
scl_pin: int
}
Upload the following as config.json unless you wish to use the defaults.
{
  "essid": "MYWIFI",
  "password": "XXXXXXXXX",
  "mqtt_enabled": "true",
  "mqtt_broker": "10.1.1.1",
  "mqtt_topic": "/smartbox",
  "mqtt_username": "homeassistant",
  "mqtt_password": "XXXXXXXX",
}
Installing upydev and mpy-cross compiler for limiting memory usage during development phase, simplify copying python files during development, using shell script such as
# File such as build_upload.sh
mkdir mpy
rm mpy/*.mpy
mpy-cross-v6.1 -march=xtensa -v -o mpy/entrymain.mpy entrymain.py
mpy-cross-v6.1 -march=xtensa -o mpy/mylogger.mpy mylogger.py
#  etc
upydev put mpy/*.mpy
upydev put config.json
But eventually to minimize the memory footprint you need to actually build the firmware and the steps that worked out well and based on these instructions..
# Build "compiler" docker container and start shell
$ docker run --name mp --rm -it larsks/esp-open-sdk bash

# Within docker
$ git clone https://github.com/micropython/micropython.git

# Using xonsh shell and copy all .py files to moduled
for f in p'.'.glob('*.py'):
    print(f'copy {f.as_posix()}')
    docker cp @(f) mp:/micropython/ports/esp8266/modules

# In docker
$ cd /micropython && make -j BOARD=GENERIC

# On host
$ docker cp mp:/micropython/ports/esp8266/build-GENERIC/firmware-combined.bin .

# Flashing from MacOS
$ esptool.py --port /dev/tty.usbserial-AB0JJJ3K erase_flash
$ esptool.py --port /dev/cu.usbserial-AB0JJJ3K --baud 460800 write_flash --flash_size=detect -fm dout 0 firmware-combined-with-modules.bin

# Start ESP8266 and connect to Wifi and enable WEBREPL to test code
>>> import network ; wifi = network.WLAN(network.STA_IF) ; wifi.active(True) ; wifi.connect('SSID', 'PASSWORD')
>>> import webrepl ; webrepl.start(password='xxxx')

# Hint using "shell" commands on ESP8266
>>> from upysh import *