GUI
The most effective and efficient way to use GPT-Subtrans is with the GUI. Once installed (see readme) opening the GUI should just be a question of running the gui-subtrans command or shell script, depending on your platform.
The main toolbar has only a few options at the moment:
-
Load - this will open a dialog where you can select an SRT file to translate, or a
.subtransproject that was previously created from an SRT. A new project is created automatically if thesubtransfile does not exist. -
Save - the project file and translated subtitles are updated automatically after most operations, but if there is a need to save manually you can do it with this. Holding shift will open a dialog to select a different filename for the project. Translated subtitles are always saved in the same directory as the project, with a -ChatGPT suffix on the filename.
-
Start - this will start or resume translating subtitles, processing one batch at a time until the translation is complete. When resuming translation any batches that have errors will be retried.
-
Fast Forward - will start or resume translating on multiple threads. This can greatly improve the translation speed, but is less stable so it should only be treated as a preview feature.
-
Stop - only enabled when a translation is running, this will terminate the running jobs. It waits for the current command to complete, which can take a while.
-
Quit - bye bye.
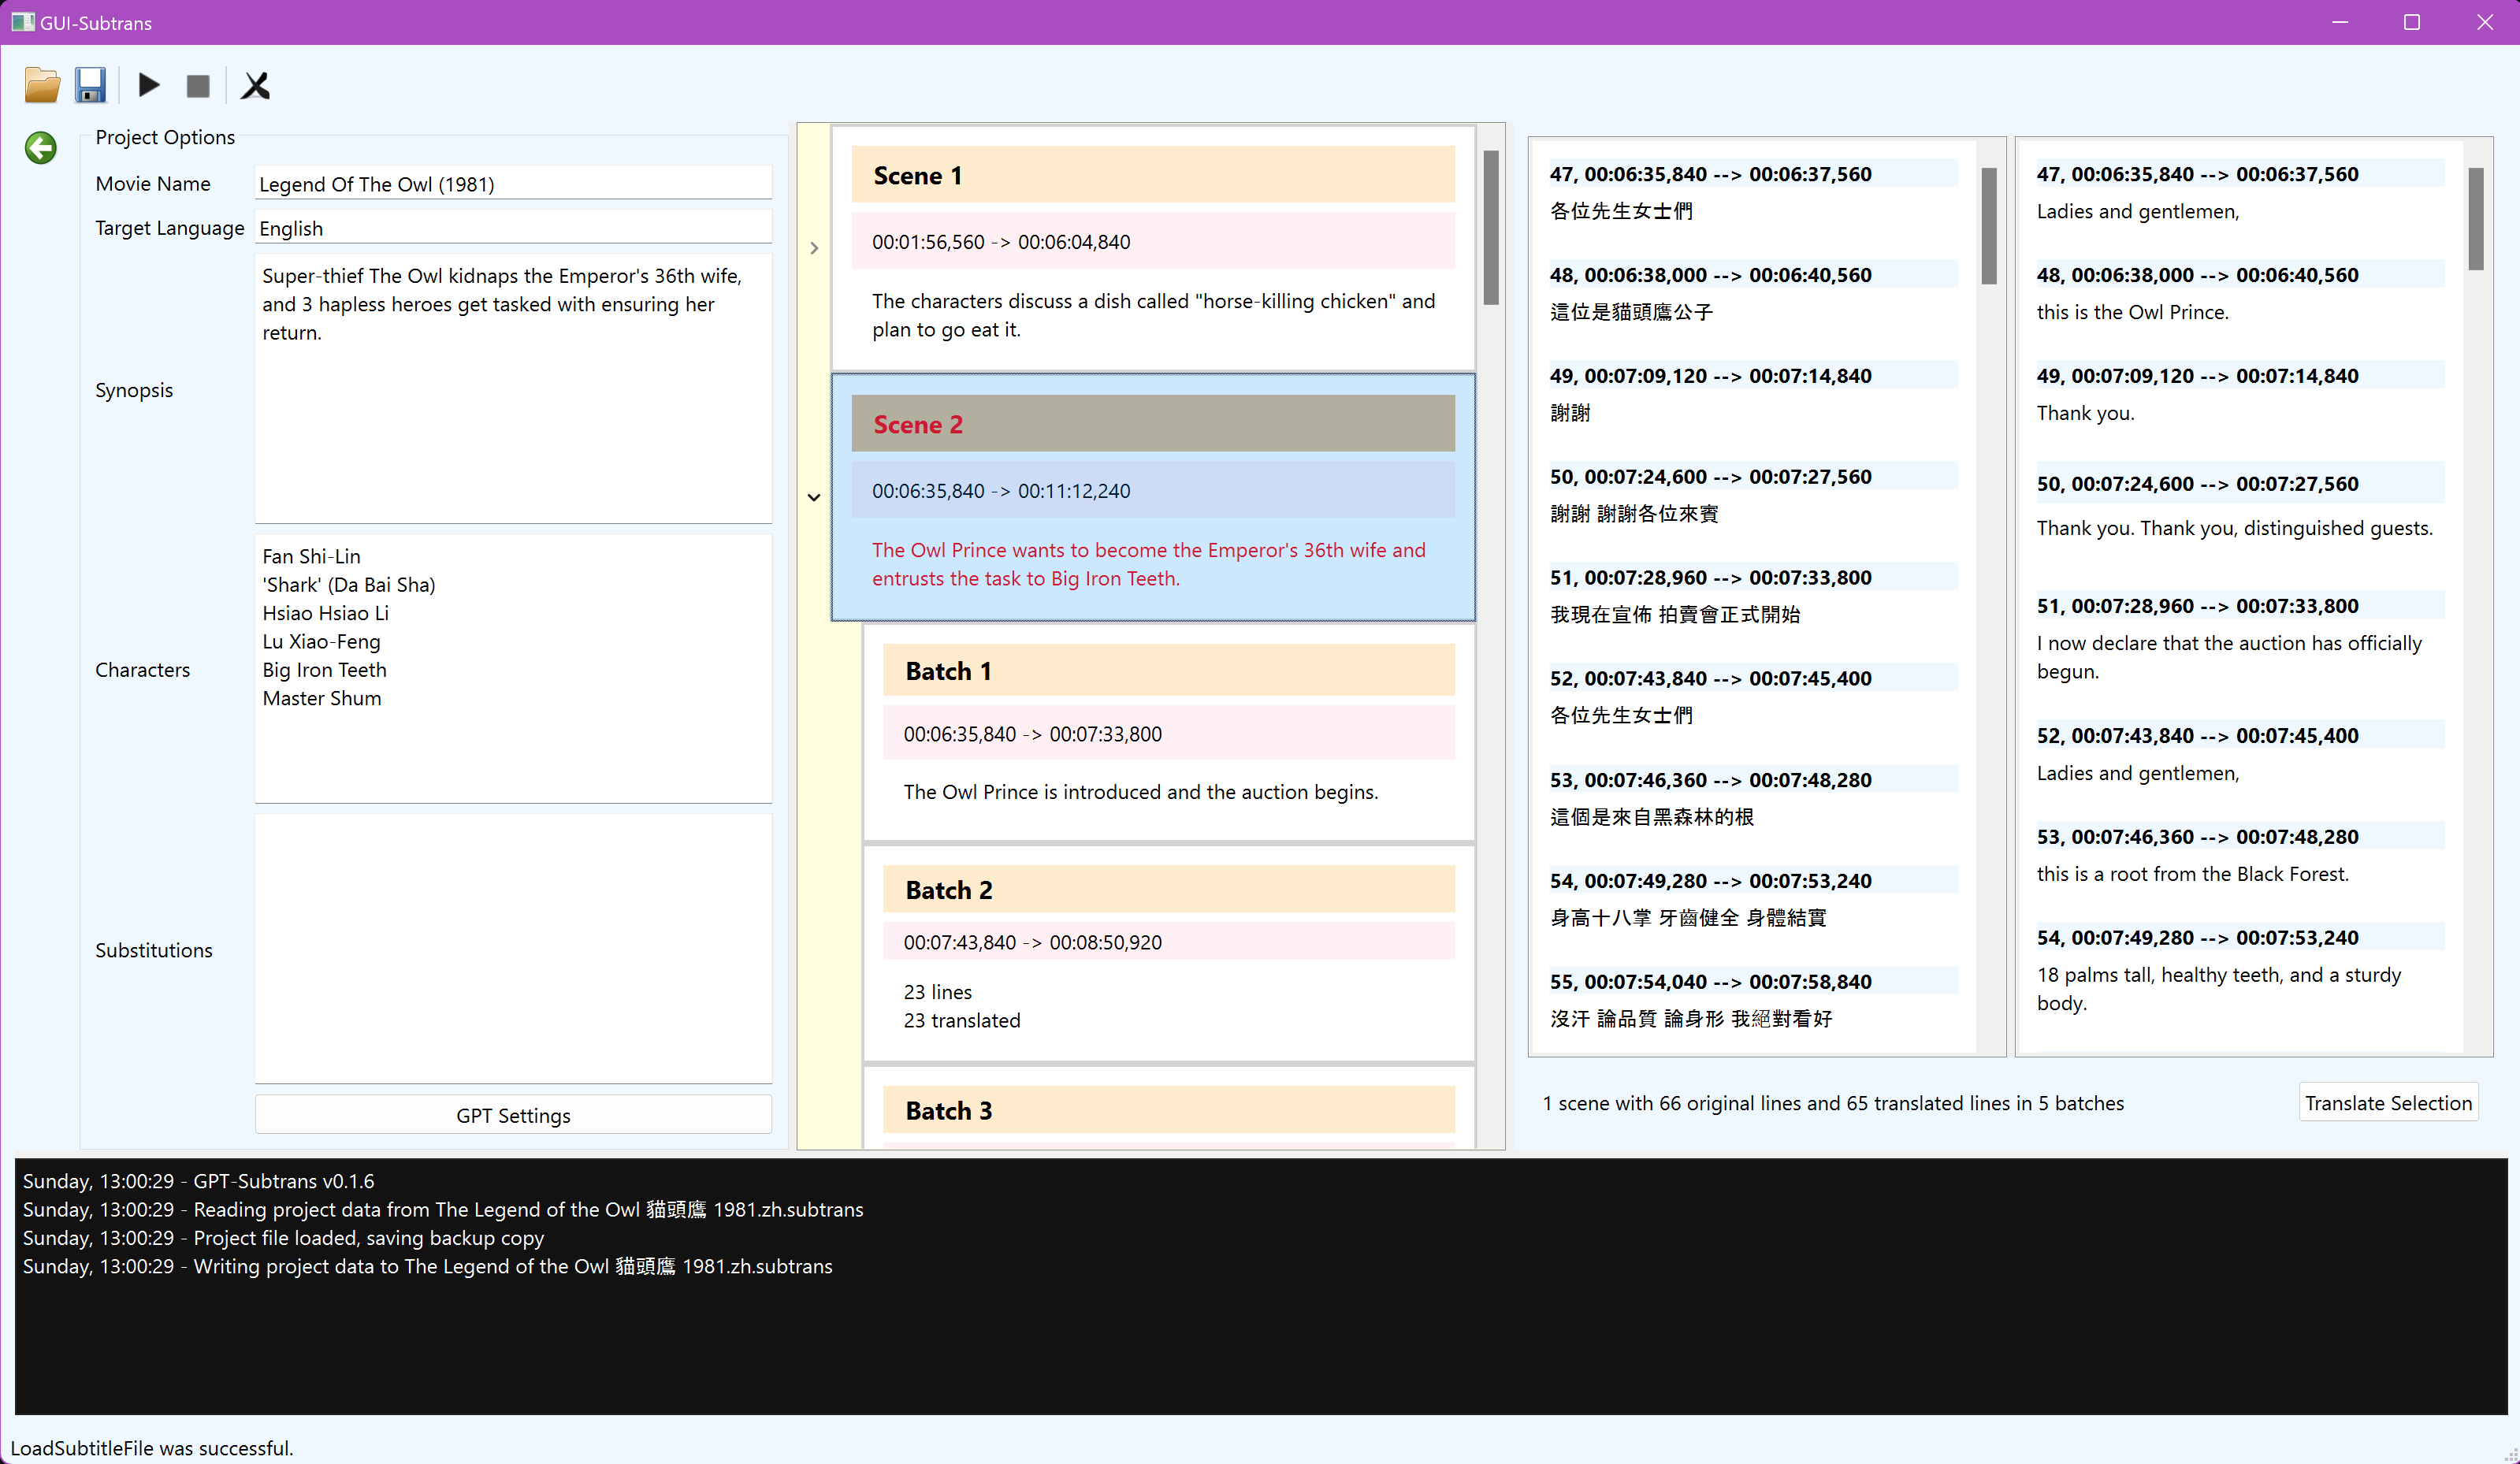
Once a project has been opened or created the central portion of the window will be populated with the views and tools that enable translation.
Currently only one button, which hides or shows the project options.
When a new project is opened an options panel is automatically displayed prompting for information about the project. It's recommended to at least fill in the name of the movie and the target language. Adding further information like a synopsis and character list is of debatable value, but can sometimes help ChatGPT translate correctly.
The substitution list can be used to force words in either the source or the translation to be replaced. The expected format is a list of replace this##with that pairs.
There is a button at the bottom to open a separate window for GPT settings, which can safely be ignored for most users.
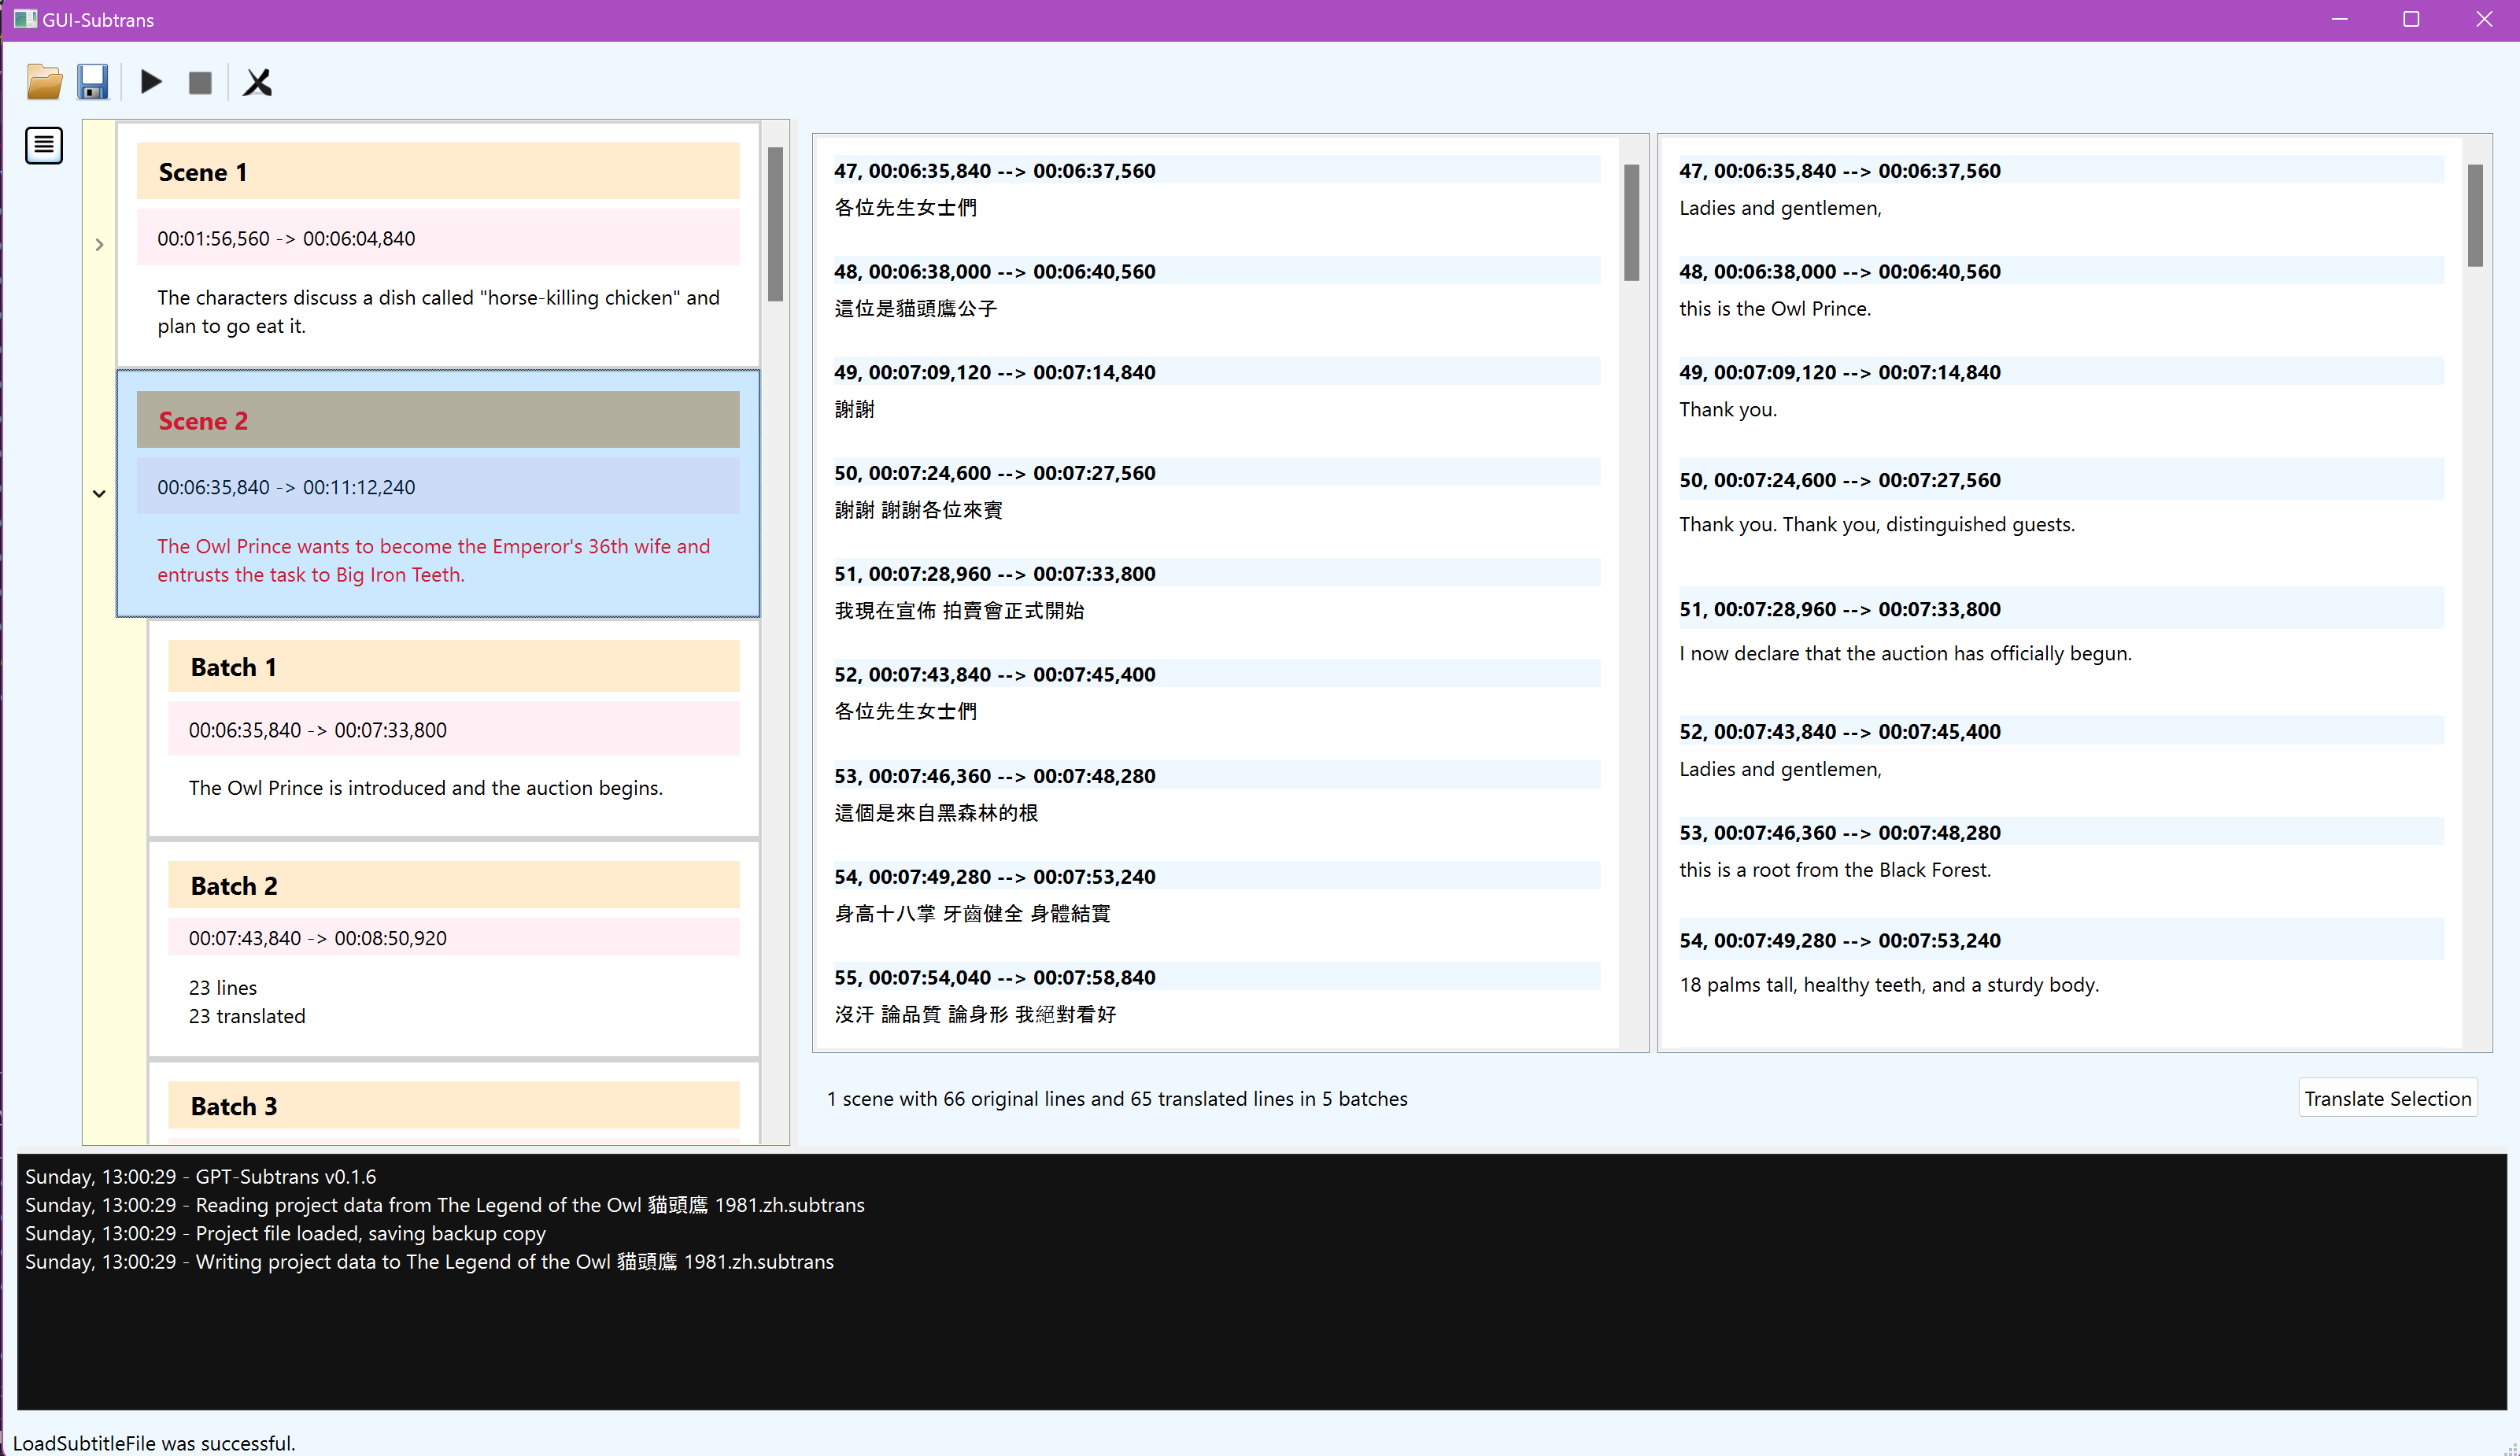
The next column shows a list of scenes and batches, sorted as a tree. Selecting a scene will automatically expand it to show the batches, and display the subtitles and translations for that scene in the remaining columns.
Subtitles are automatically batched when an SRT file is loaded. One of the main reasons for developing the GUI was to allow more user control over the batches, though it is currently quite limited.
Scenes and batches that have not been translated have a darker header colour, whilst scenes or batches that had an unrecovered error during translation will be highlighted in red.
The left panel shows the original lines from the scene. Selecting a subtitle will automatically highlight the matching translation, if there is one.
Some of the most useful functionality is hidden at the bottom the subtitle view, with a number of options that are dynamically shown depending on the current selection. It's also the most experimental and flaky functionality, so handle with care.
Individual scenes or batches can be translated, batches or scenes can be merged, creating larger batches or scenes. Individual lines can be merged, which can be helpful when ChatGPT insists on merging them in the translation, desynchronising subsequent lines.
Coming soon: splitting scenes and batches.
Various updates about completed or ongoing operations will be displayed here, colour coded for INFO/WARNING/ERROR messages (or the extremely verbose DEBUG, if enabled).
Brief messages regarding the app's most recent activity.