Getting Started
This page is a simple demo that walks through basic ThreadFix functionality and initial setup.
After downloading the zip file, getting ThreadFix running is easy. Simply unpack it and then click on the threadfix.bat icon in Windows, or, if you are on a UNIX-based (Linux, OS X, etc) system, navigate to the folder and execute bash threadfix.sh start.
If you are already running a server on port 8080, you can edit the port ThreadFix uses by going into the server.xml file in the Tomcat distribution (it’s at /tomcat/conf/server.xml) and editing the port parameter in the Connector tag.
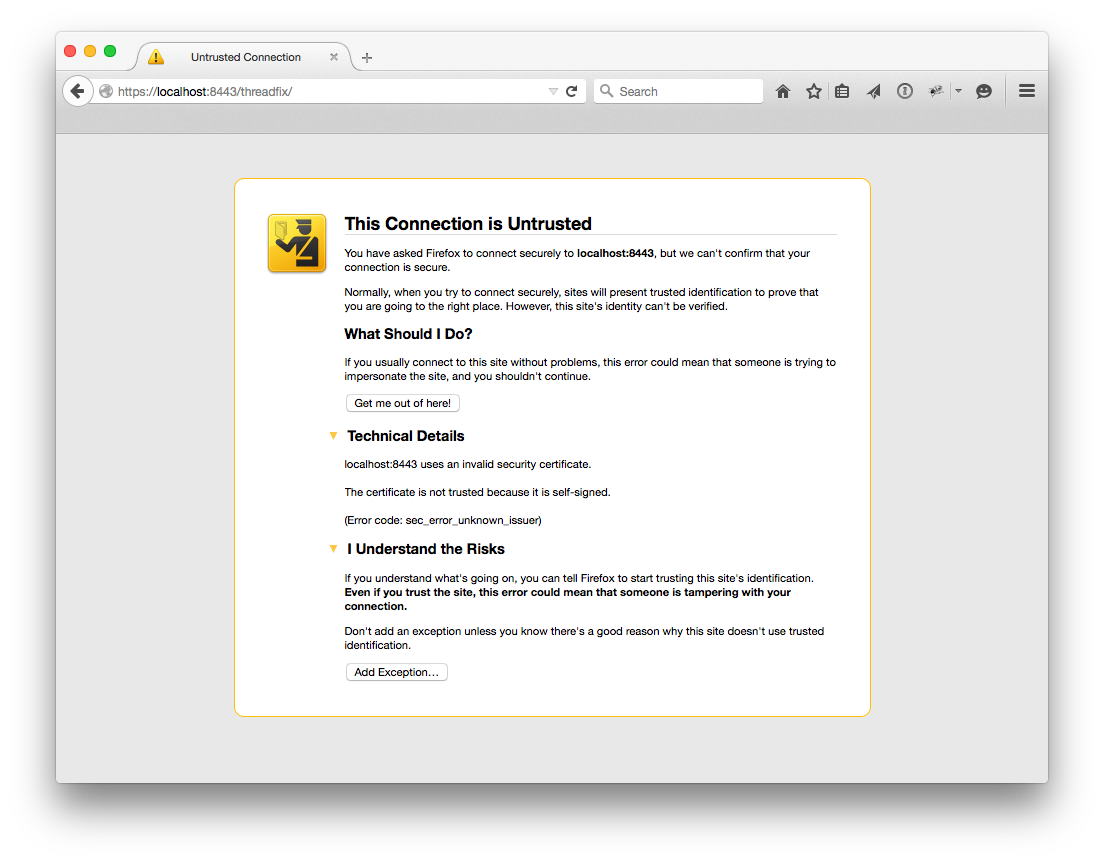
Once ThreadFix is up and running, go to http://localhost:8080/threadfix in a web browser. Your browser will present a warning screen about the SSL certificate. ThreadFix generates a unique self signed SSL certificate when it first starts up. You need to add the certificate to your list of trusted certificates to continue.
Click "I understand the risks," click "Add Exception…", click "Confirm Security Exception"
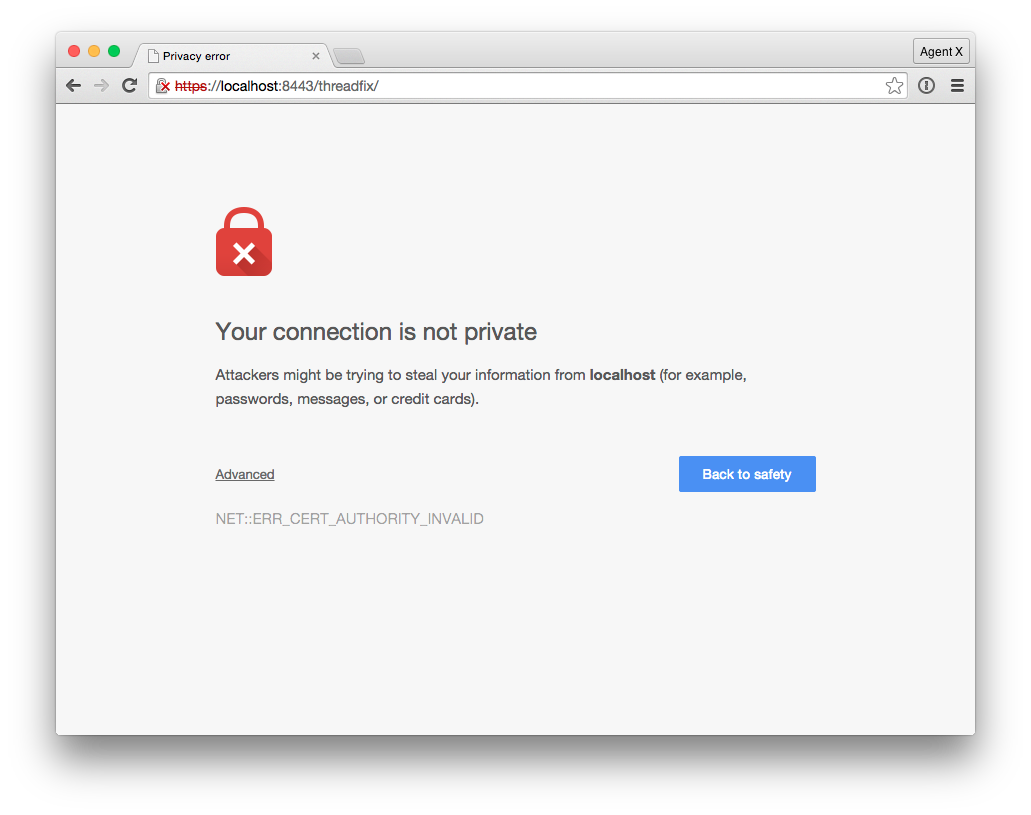
Click “Continue to this website.” There will be a red address bar but you can ignore it.

In newer versions of chrome (>v40), there will be an error page indicating that the webpage is unavailable because the site uses an unsupported protocol. Chrome does not accept self signed certs anymore. Until we can solve this problem, please use other browsers to run threadfix. Note: This shouldn't be a problem for enterprise clients since they would be installing their own SSL certs.
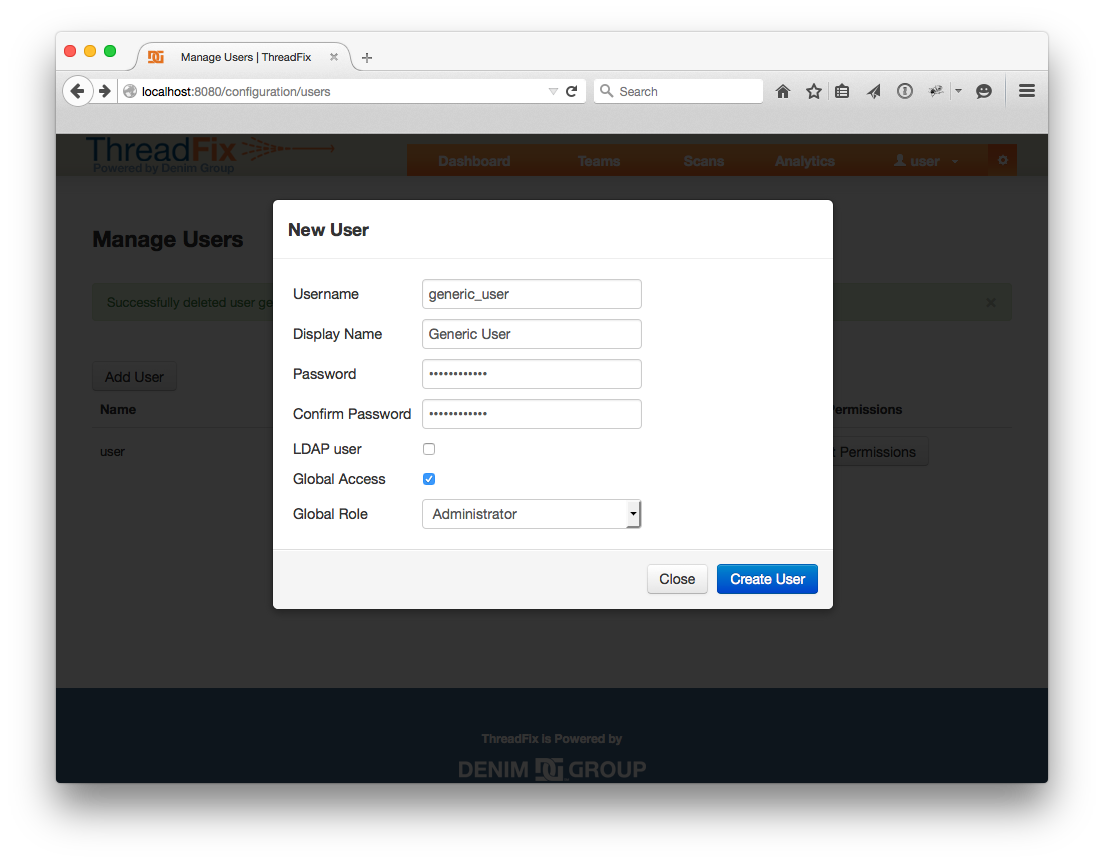
Once you get past the SSL certificate, you can log in with the username “user” and the password “password”. Your first step should be to create a new user account with a name and password of your choice. To add a new user, click the cog in the right corner of the header bar to reveal the configuration pages, then “Manage Users,” then “Add User,” pick a name and password, and submit the form by clicking "Create User".
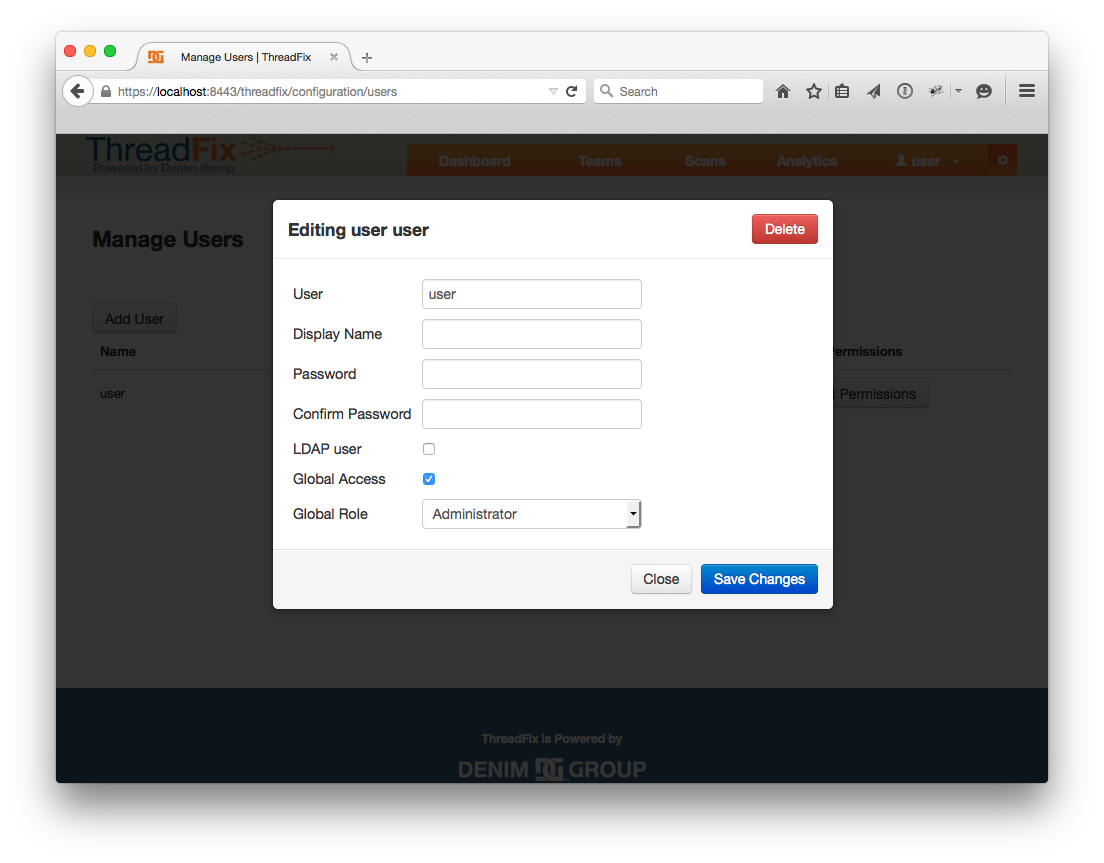
Next, log off and log back in as the user you just created and delete the user "user". To delete the user “user”, navigate to the same "Manage Users" page, then click "Edit/Delete" for the row matching the user “user”. The following modal will appear. Click the "Delete" button, found in the top right corner of the modal.
In this demo, we’ll walk through a simulated use of ThreadFix, using the scans included in the zip distribution. The scans came from the PHP demo site, which was developed as an intentionally vulnerable web application to test automated patching.
We will start by setting up an Application with a WAF and a Defect Tracker. The Defect Tracker portion of the demo requires a defect tracker installation, but if you don’t have one, you can skip that part. After the Application is set up, we’ll upload scans that were conducted without a WAF in place. Then we’ll generate WAF rules and upload a sample log to the WAF, and upload scans that were conducted with the WAF rules in place. We’ll also package and export a bug to the Defect Tracker, then change bug statuses in the tracker and import the current bug status back to ThreadFix.
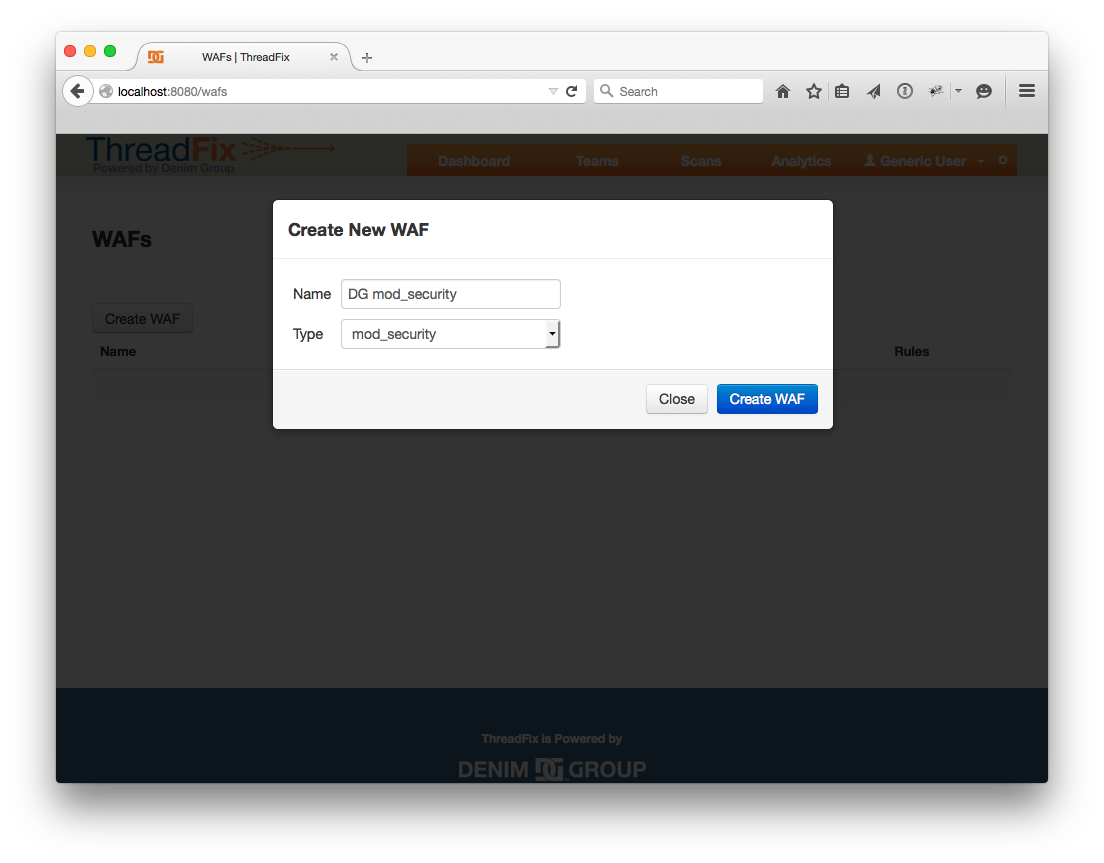
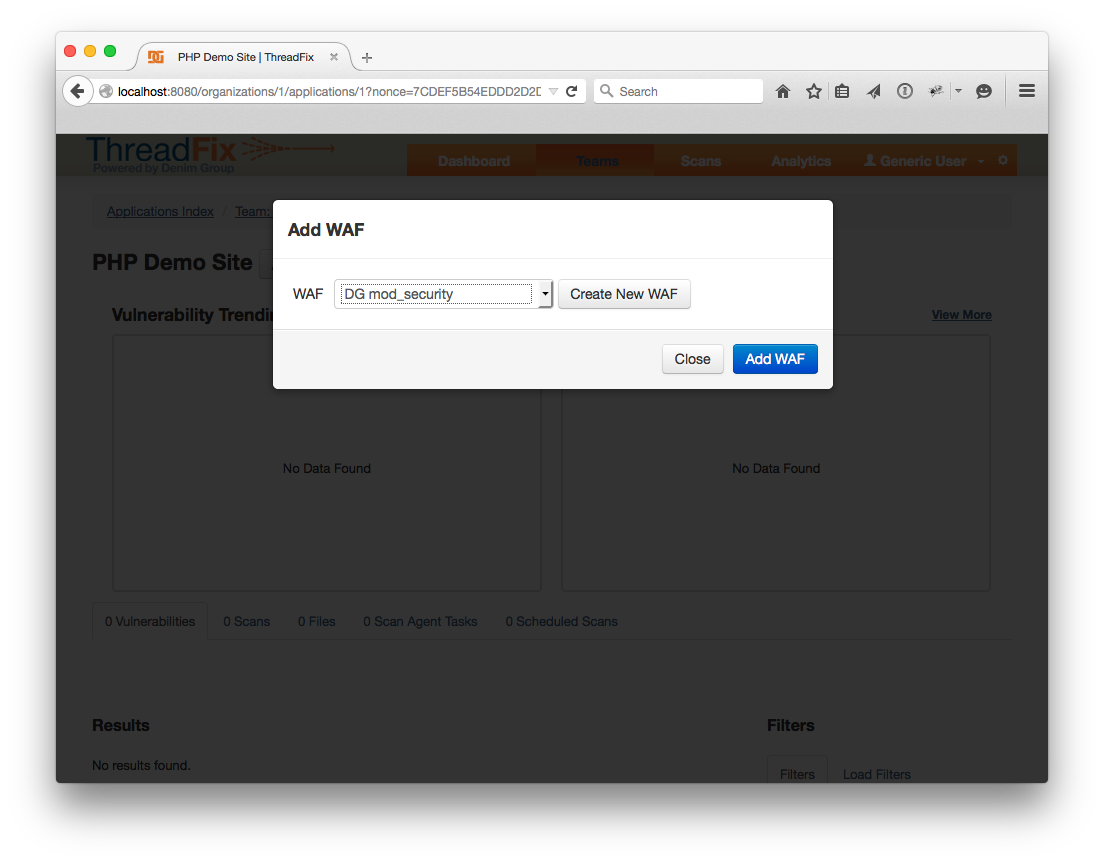
To set up a WAF, click the configuration cog in the right corner of the header bar to reveal the configuration pages. Click “WAFs”, then “Create WAF”. Fill out a name and pick “mod_security” for the type, then click “Create WAF”.
To set up a Defect Tracker, click the configuration cog in the right corner of the header bar to reveal the configuration pages, then click “Defect Trackers”, then “Create New Defect Tracker”. Fill out the form and click “Create Defect Tracker”.
![]()
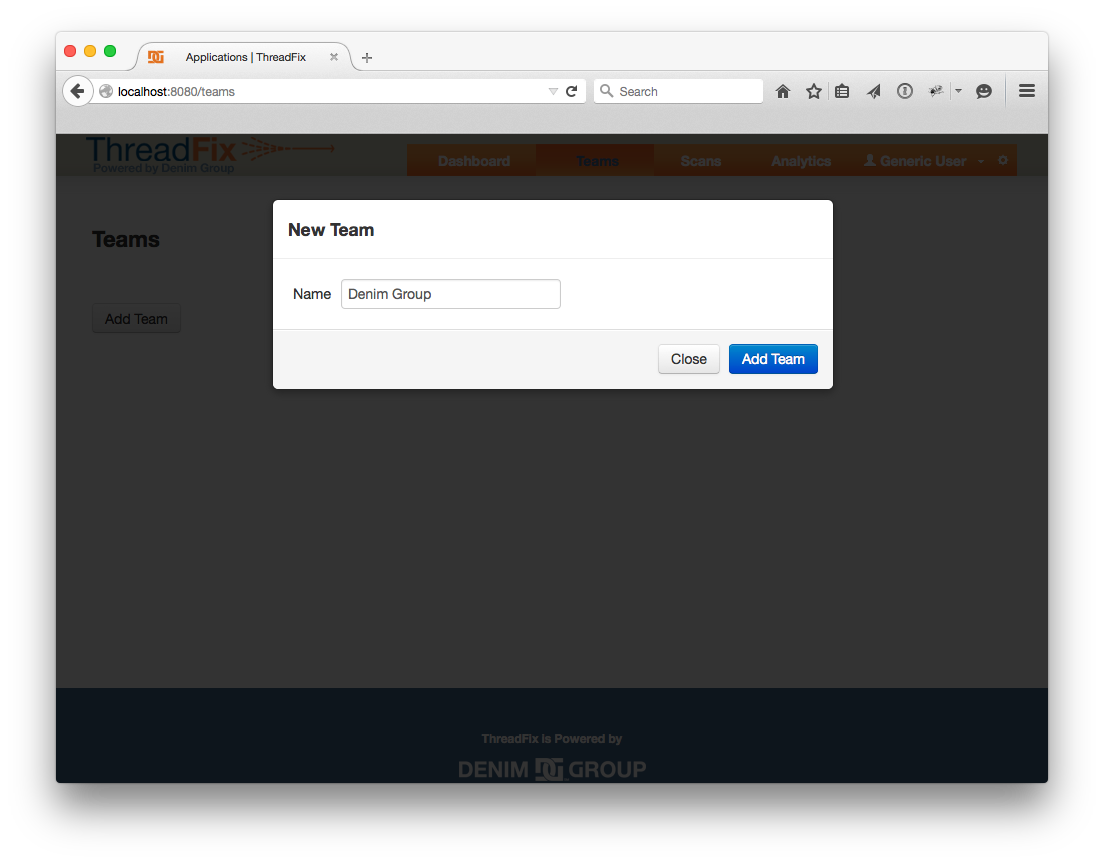
Next we need to set up a Team. Click “Applications” in the header bar, then “Add Team”, then fill out a name and click “Add Team”.
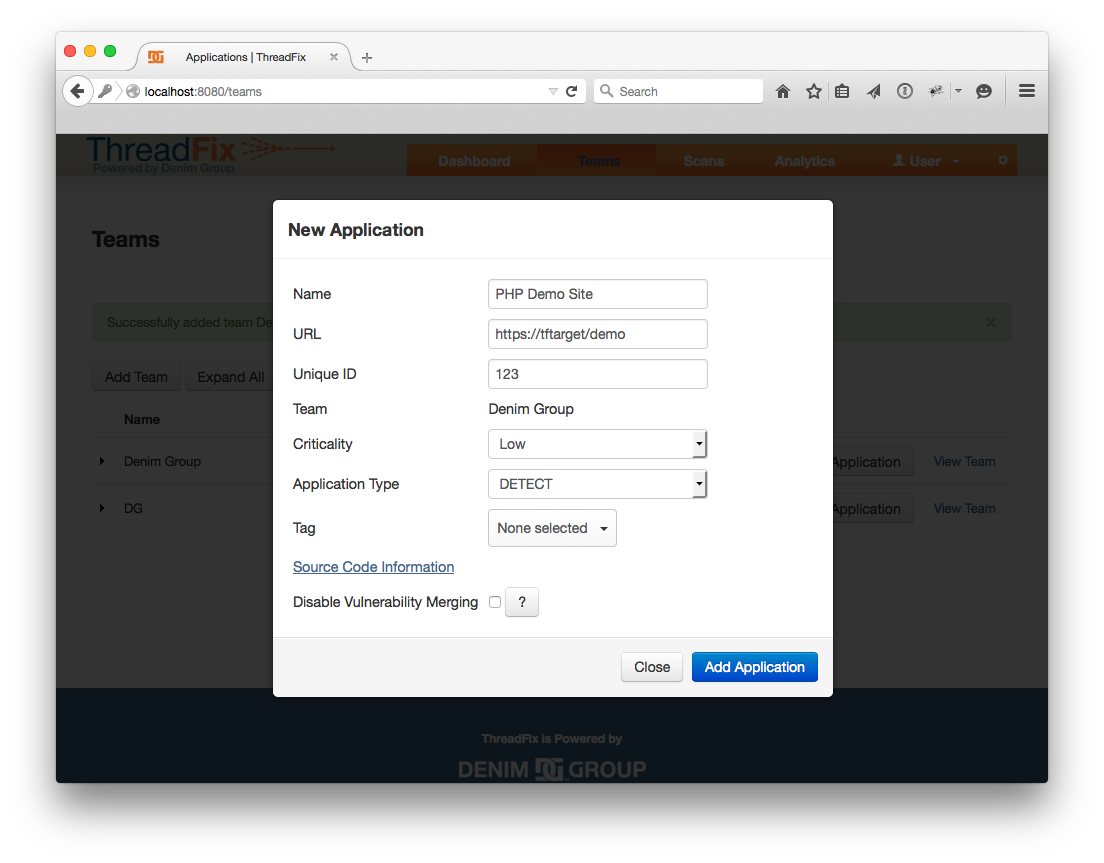
We are finally ready to create the Application. Click “Add Application”. Fill in the name, URL, Criticality, and Application Type.
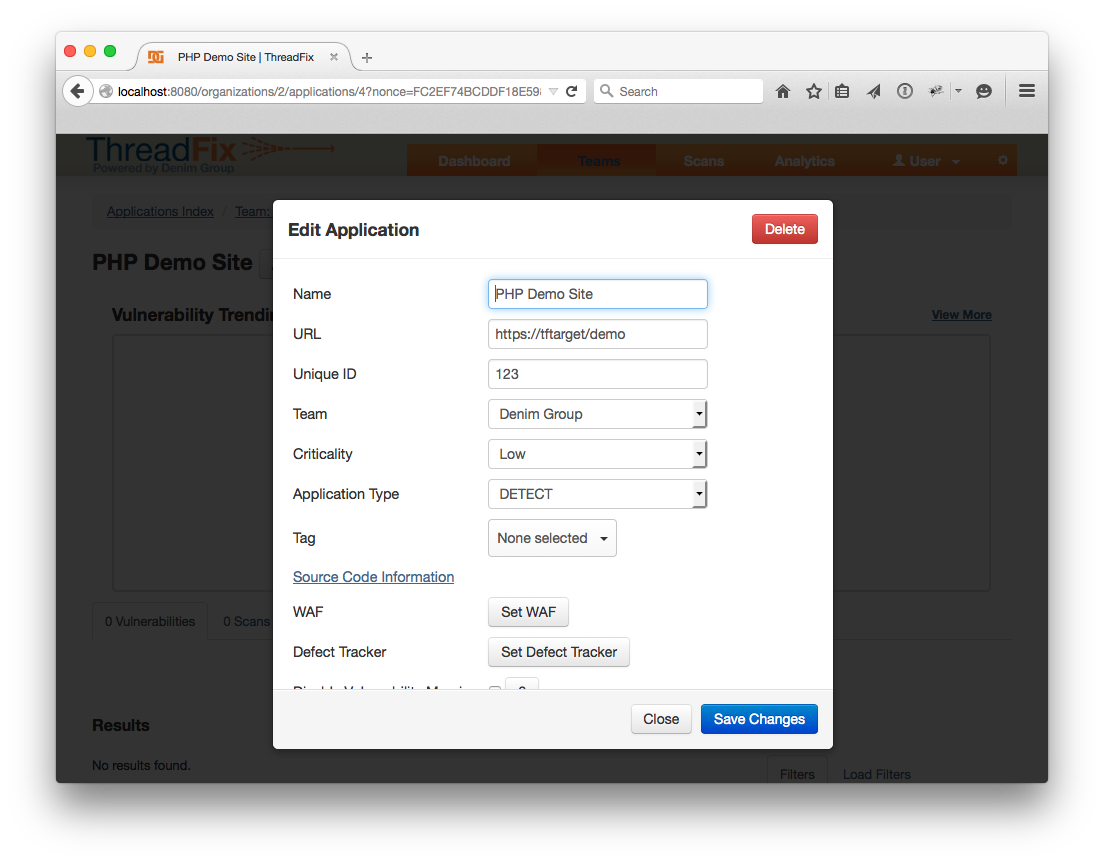
 Next click on the Application you created, then click on the “Action” drop down menu and choose “Edit / Delete”
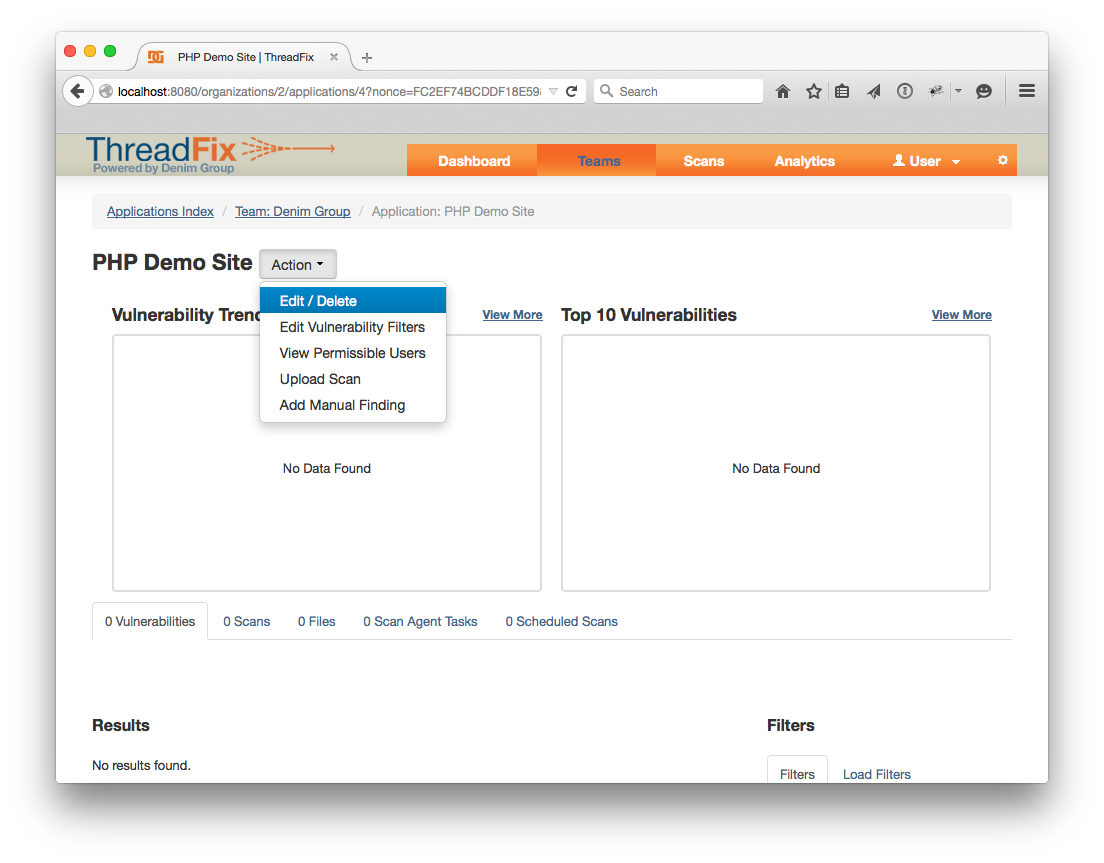 This will bring up a way to edit the Application, configure a Defect Tracker, and a WAF.
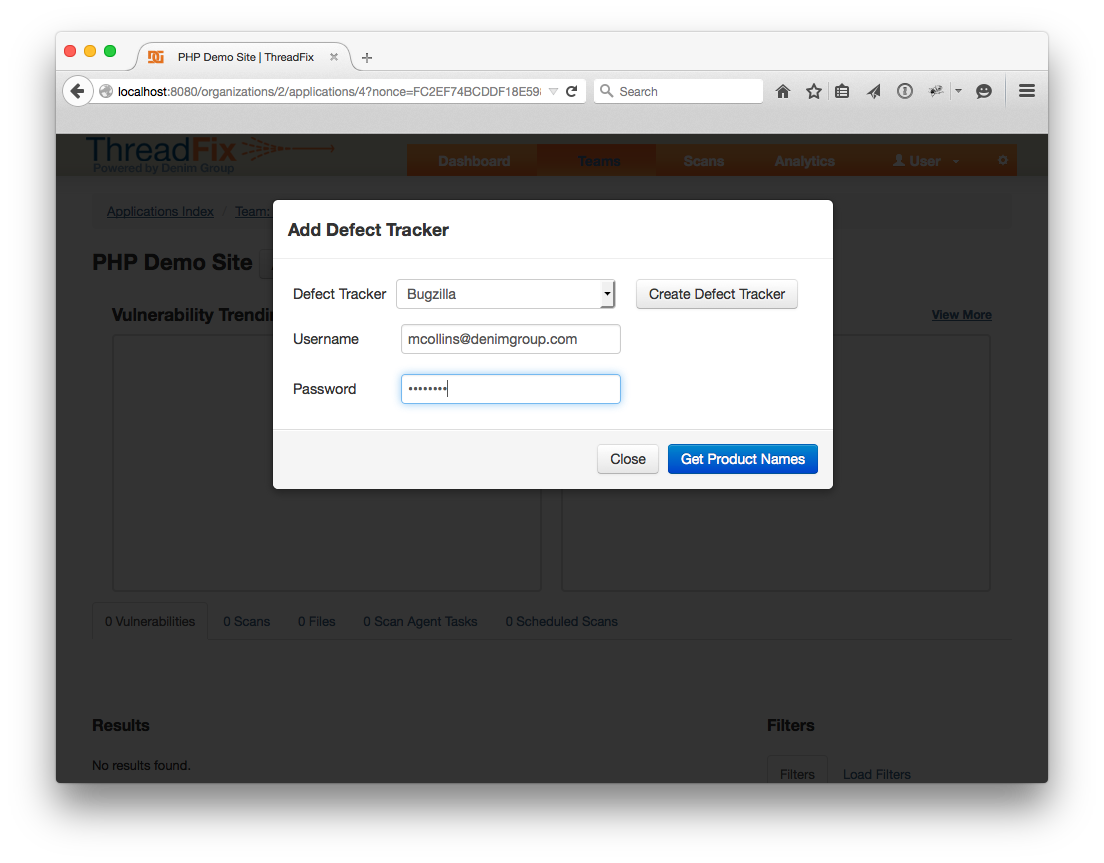
 For the Defect Tracker, pick the correct name from the drop-down, then fill in a valid username and password. Click “Get Product Names”. If all goes well, a drop-down for “Product Name” should populate with the products in the Defect Tracker.
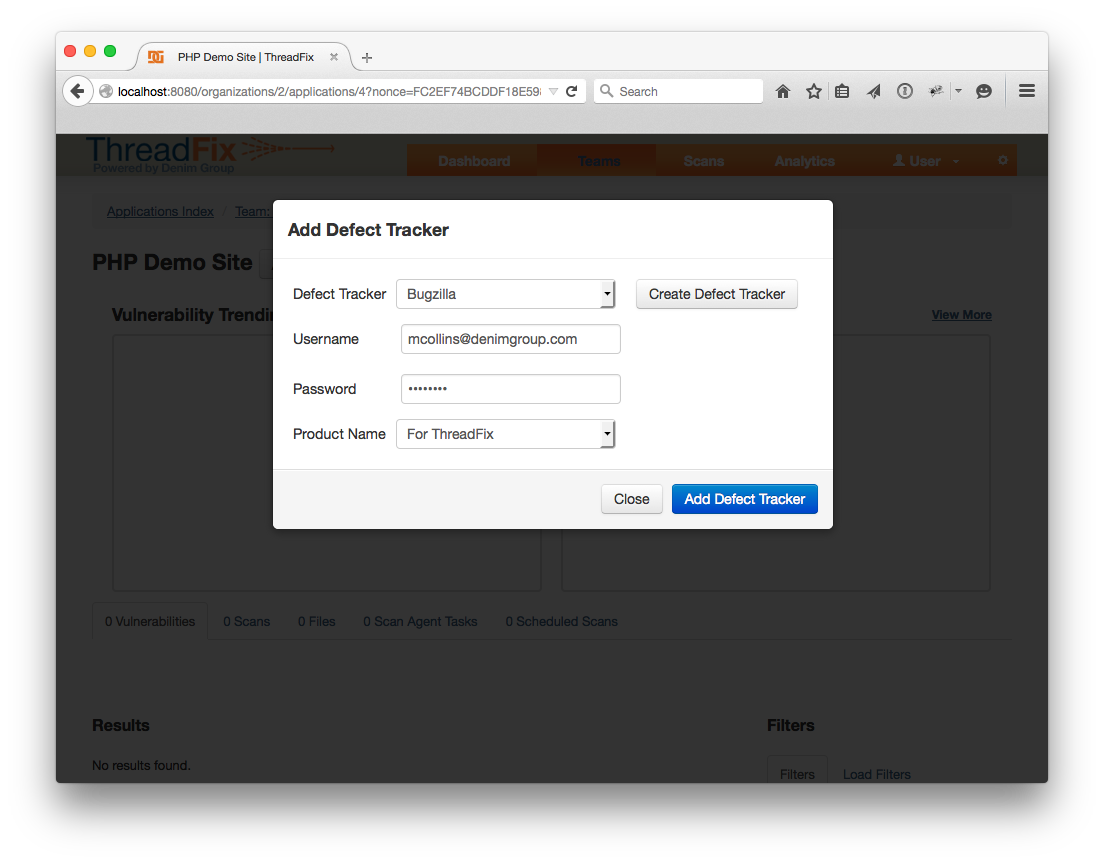
Pick one, then pick the WAF from the WAF drop down, and submit the form by clicking "Add WAF".
 Note that Bugzilla requires the selected product to have a component. Information about adding a component to a project can be found [here for version 3.6] (http://www.bugzilla.org/docs/3.6/en/html/components.html) and [here for version 4.4] (http://www.bugzilla.org/docs/4.4/en/html/products.html#comps-vers-miles-products).
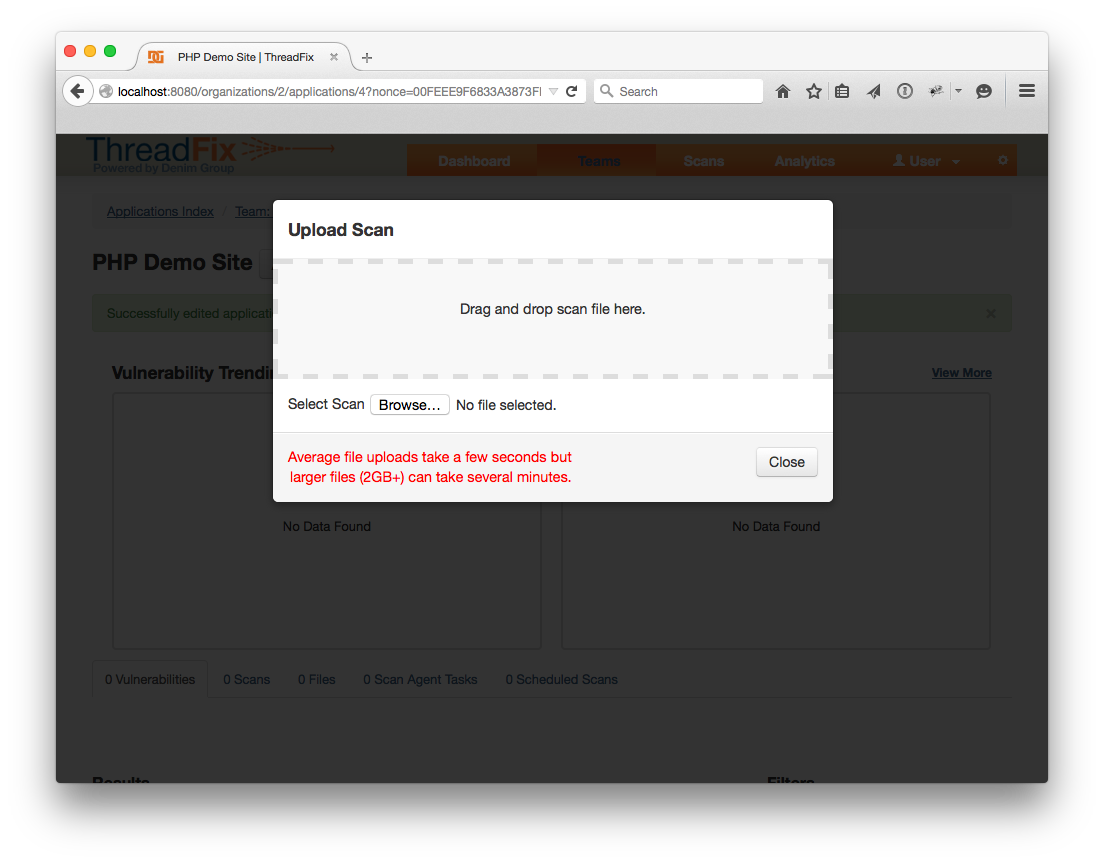
Now that we have an Application, let's now upload scan results. To do this, click the “Action” drop down menu and choose “Upload Scan”. Click the “Browse…” button and choose skipfish-demo-site.zip from the “test-scans” folder. The scans will automatically upload. You also have the option to drag the skipfish-demo-site.zip into the browser in order to initiate an upload.
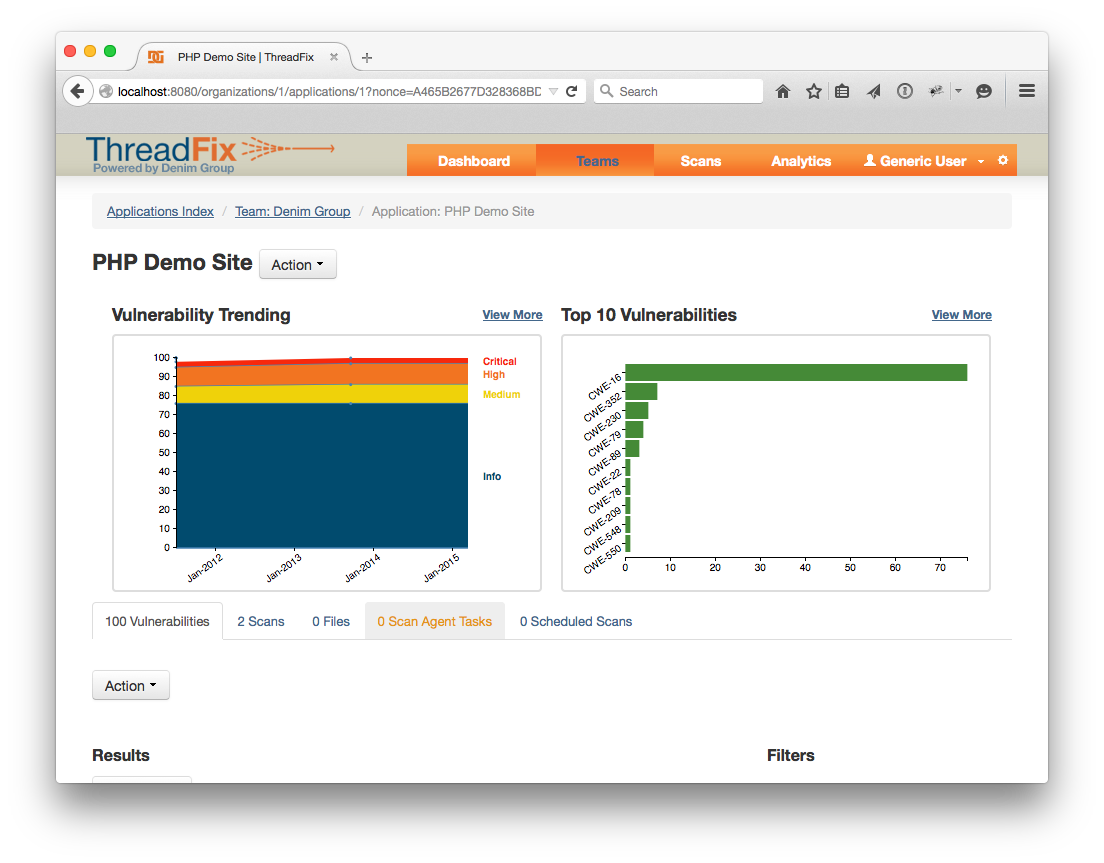
You should be redirected to the Application page with a notice about the scan processing. Now it’s time to upload the first w3af scan. The process is identical. Click “Upload Scan”, click the “Browse…” button and choose or drag the w3af-demo-site.xml file. Once that scan is also uploaded, the Application page should look like this:
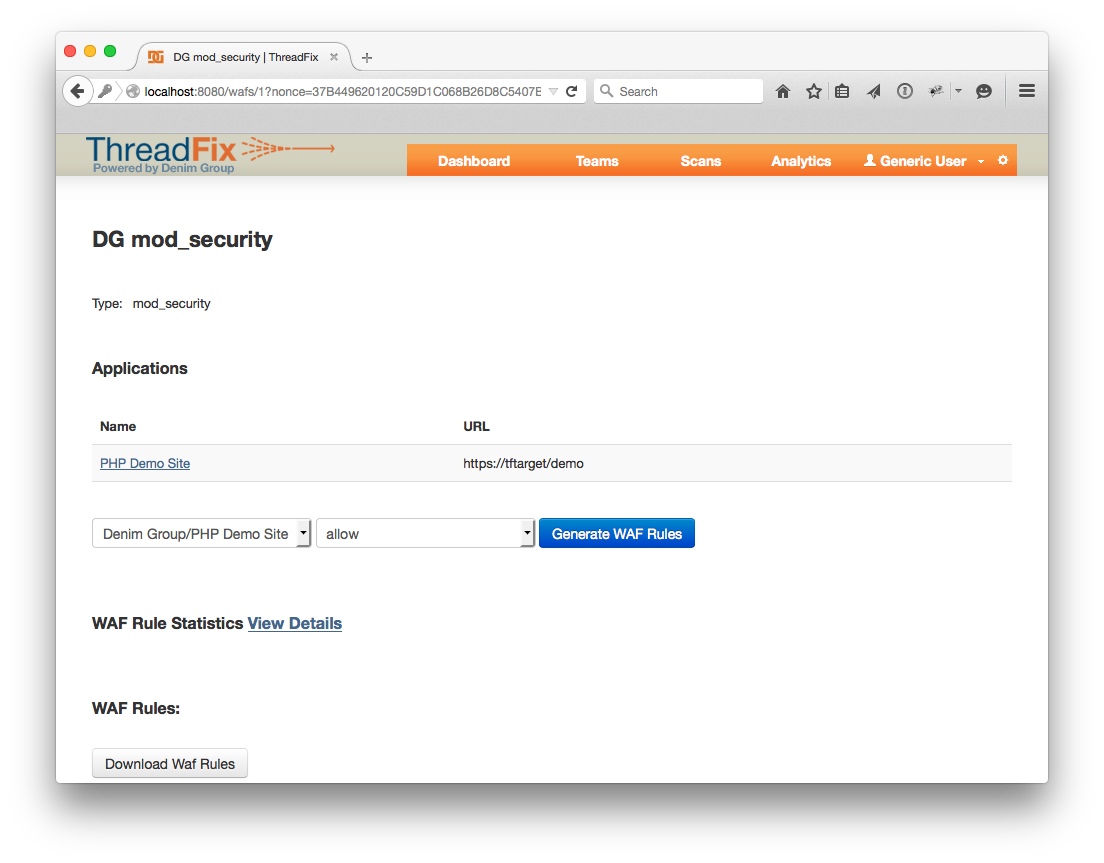
Now let’s generate some WAF rules. Click the configuration cog in the header bar. Click the "WAFs", pick a WAF directive and click the “Rules” button. Allow or pass are the least intrusive options, but drop and deny will block requests that match the rule instead of allowing them to get to your application. Refer to the Defect Tracker section for more information. You can choose to generate specific WAF rules for each your applications or apply the same one for all. Once you’ve decided, click “Generate WAF Rules”.
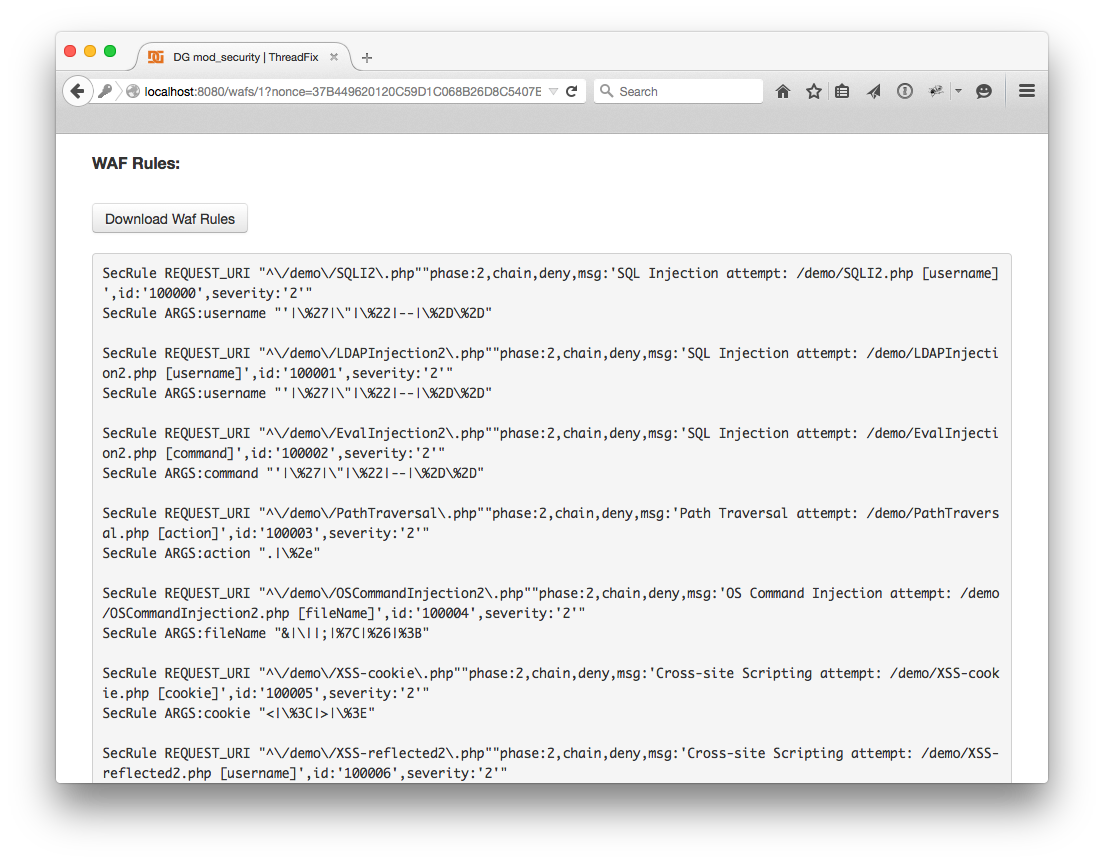
![10.5.png] (https://raw.githubusercontent.com/wiki/denimgroup/threadfix/img/getting_started/10.5generatingwafrules.png) After the rules generate, the “WAF Rules:” section should look like this. To put these rules into a WAF rules file, copy and paste the text, or click the “Download WAF Rules” button.
![10.75.png] (https://raw.githubusercontent.com/wiki/denimgroup/threadfix/img/getting_started/10.75generatingwafrules.png)
Next we will upload the sample WAF log. This is a log the WAF keeps of incoming requests that match rules. It has a lot of information in it. ThreadFix reads the default log format for Snort and mod_security. Any other formats might produce strange results. Click the “Browse…” button by the Log File: label and pick the file mod-security-log.txt.
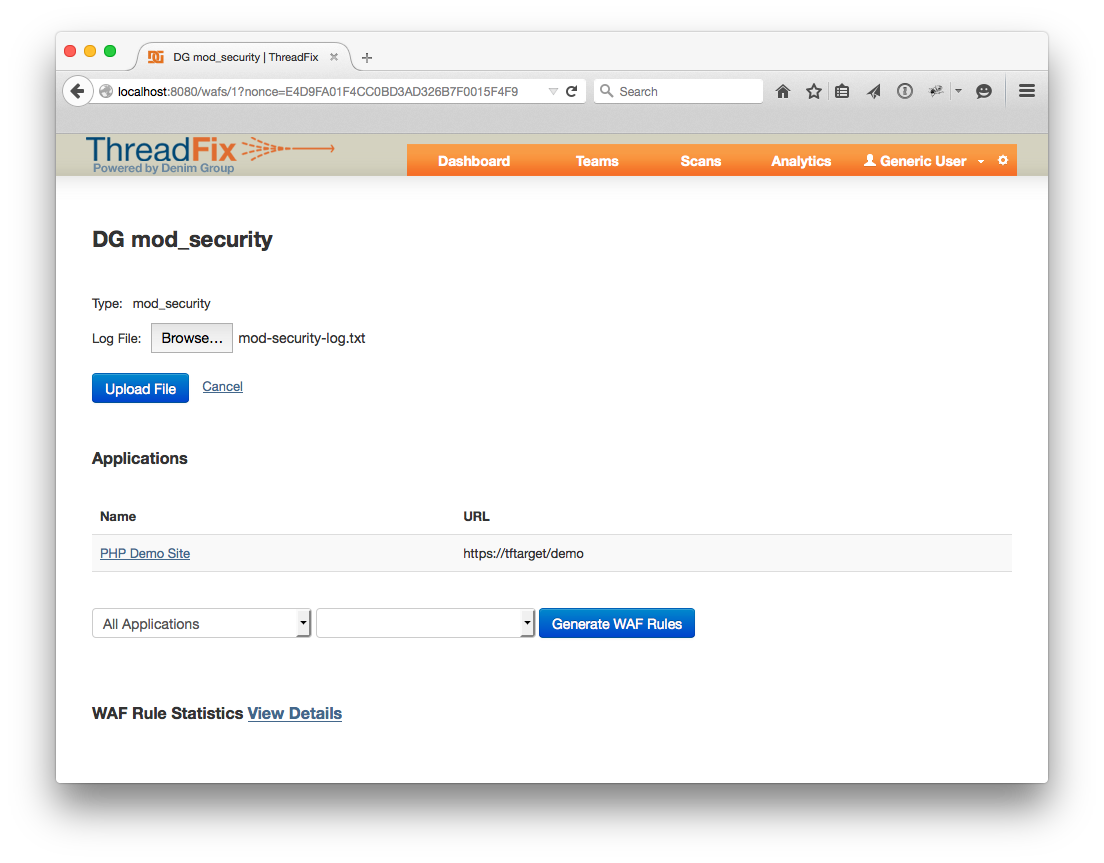
Click “Upload File” and you should get a screen like this:
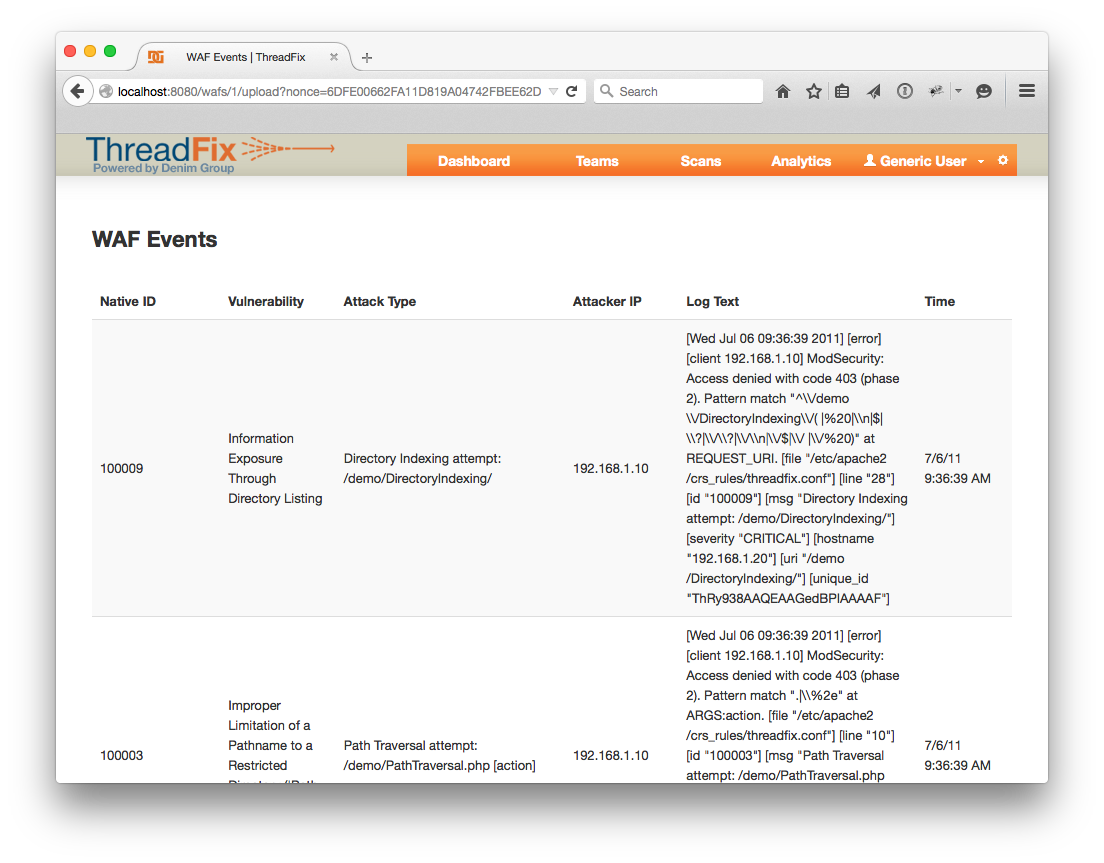
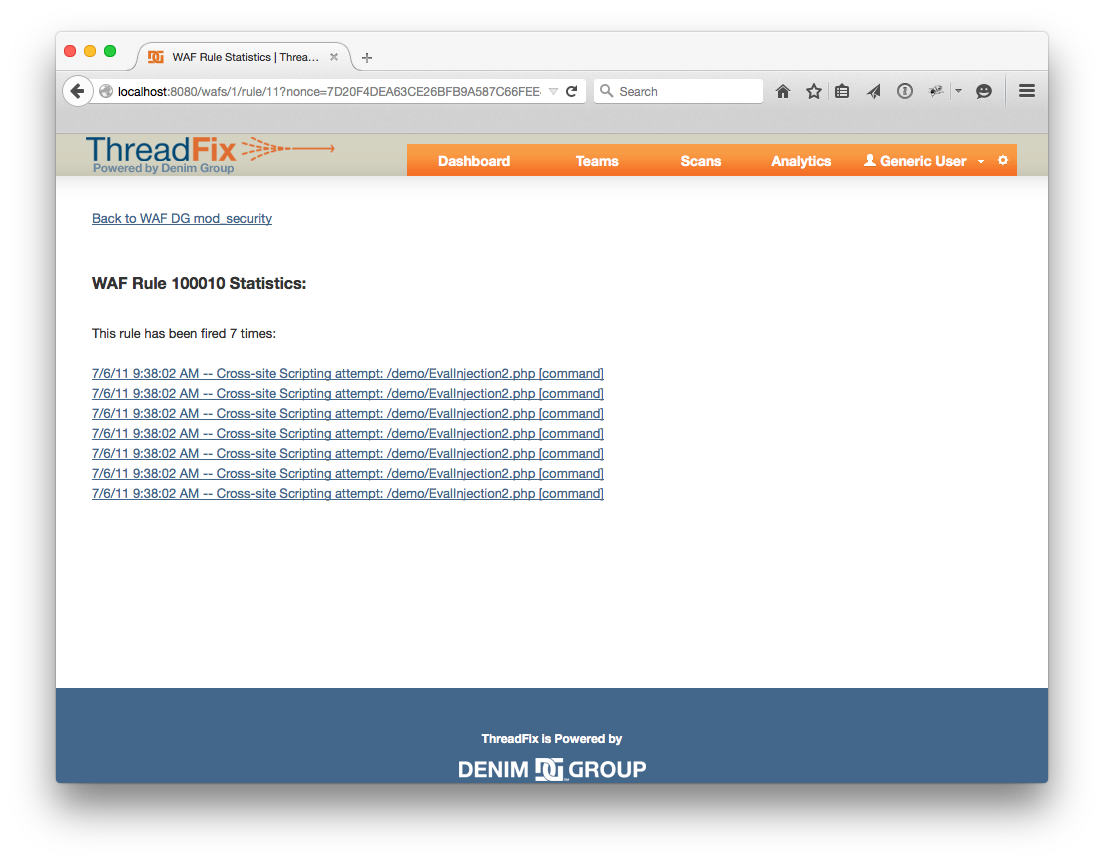
At the bottom of the page there is a “Continue” link which will take you back to the WAFs page. Click the "Rules" button for the WAF you were looking at once more. From this WAF page, you can look at the results of the upload in a more compact format. Click one of the links under the “WAF Rule Statistics” heading and you will be able to browse the log entries for that rule, and look at individual entries by clicking on the links.
Let’s assume that the WAF rules have been put into place with blocking directives and we’ve run scans again with w3af and skipfish. Let’s upload those results. Navigate to your Application page and upload skipfish-demo-site-2.zip and w3af-demo-site-2.xml. Your Application page should look like this:

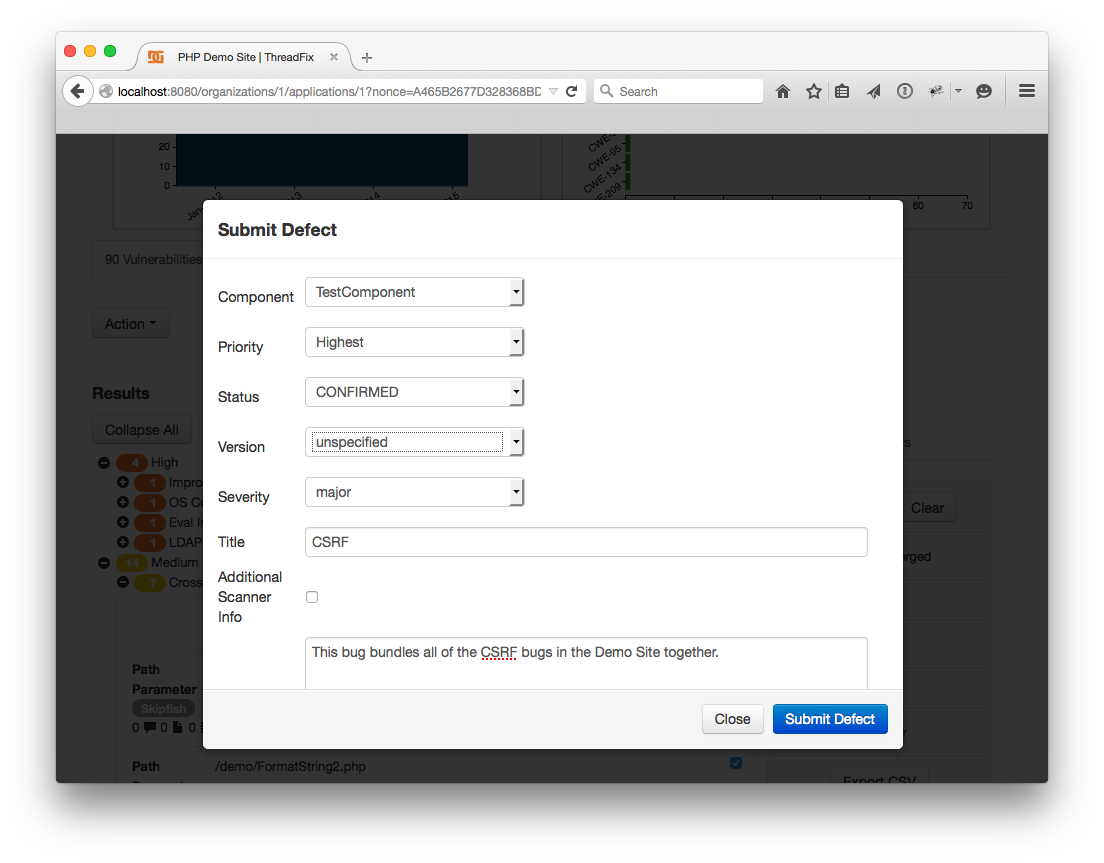
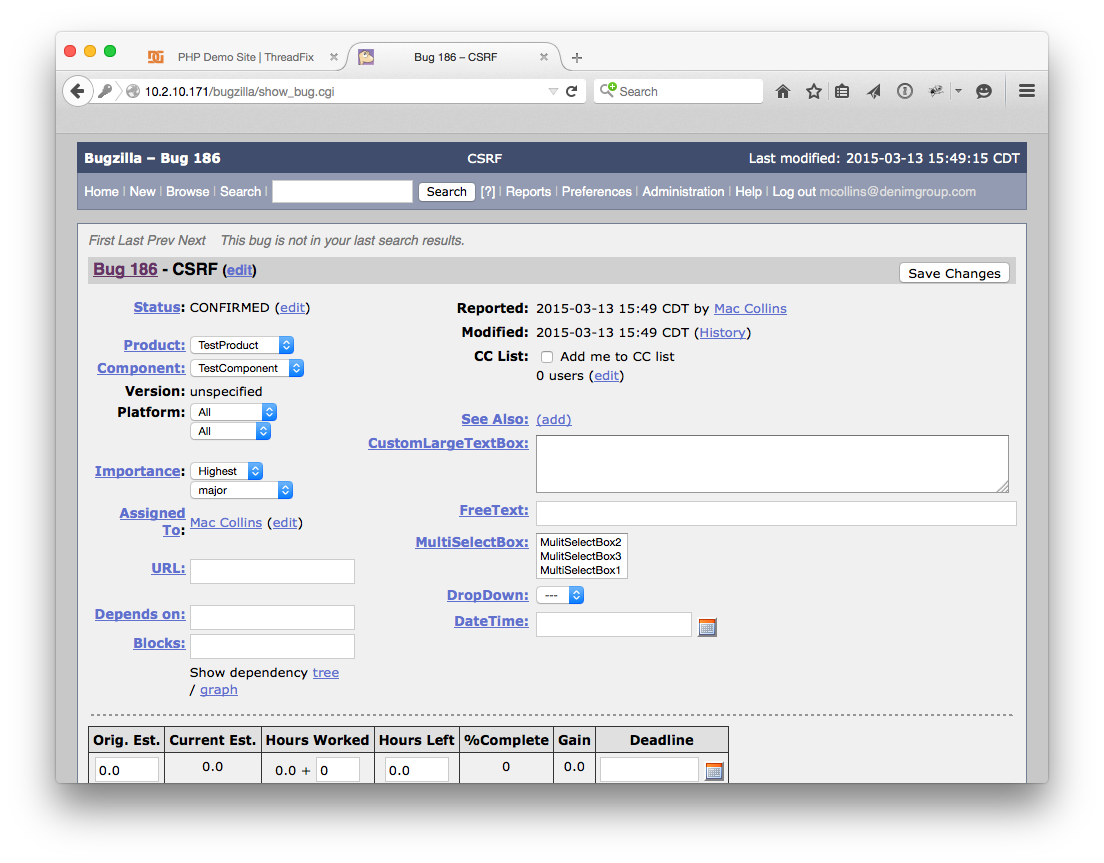
10 of those vulnerabilities were no longer picked up by the scanner. However, we still have a few CSRF vulnerabilities present. Let’s export all of them as a bug into Bugzilla -- or one of the 5 supported defect trackers. First, expand results under ' Cross-Site Request Forgery (CSRF)'. Then click the "Check All" checkmark to select all the CSRF vulnerabilities. Next, click the "Action" dropdown above the Vulnerabilities table. Select the "Submit Defects" option. There are a variety of options here. Write a short summary for the bug, give it a title, then click "Submit Defect" to submit the form.
Next, head over to your Defect Tracker (or find the Defect link in the Vulnerabilities table and click the auto-generated link there) and confirm that the defect has exported successfully.
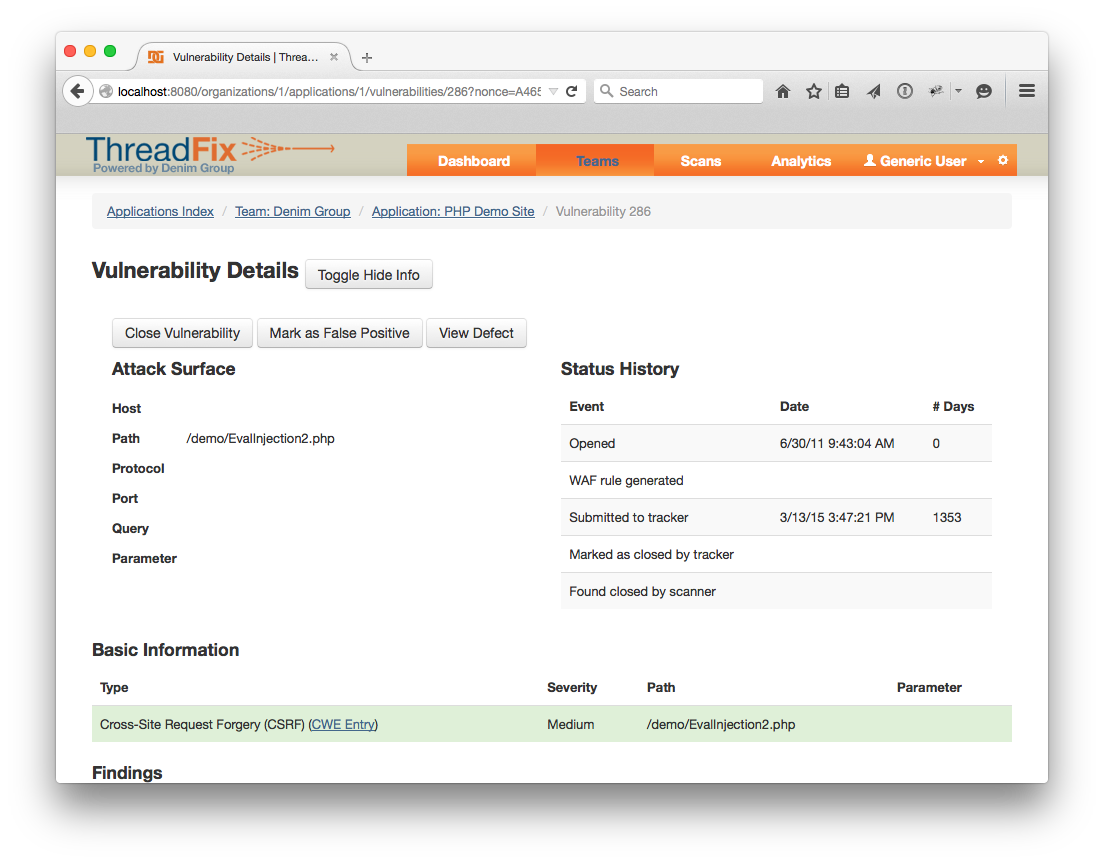
Head back to your Application page and check the IDs. Click "View More" on one of the Vulnerabilities attached to the Defect. Once you reach the Vulnerability Details Page click "Toggle More Info" You should see a date in the “Submitted to Defect Tracker” field.
ThreadFix can also import the closed or open status of the defect from the Defect Tracker. Let’s close the bug in our tracker.
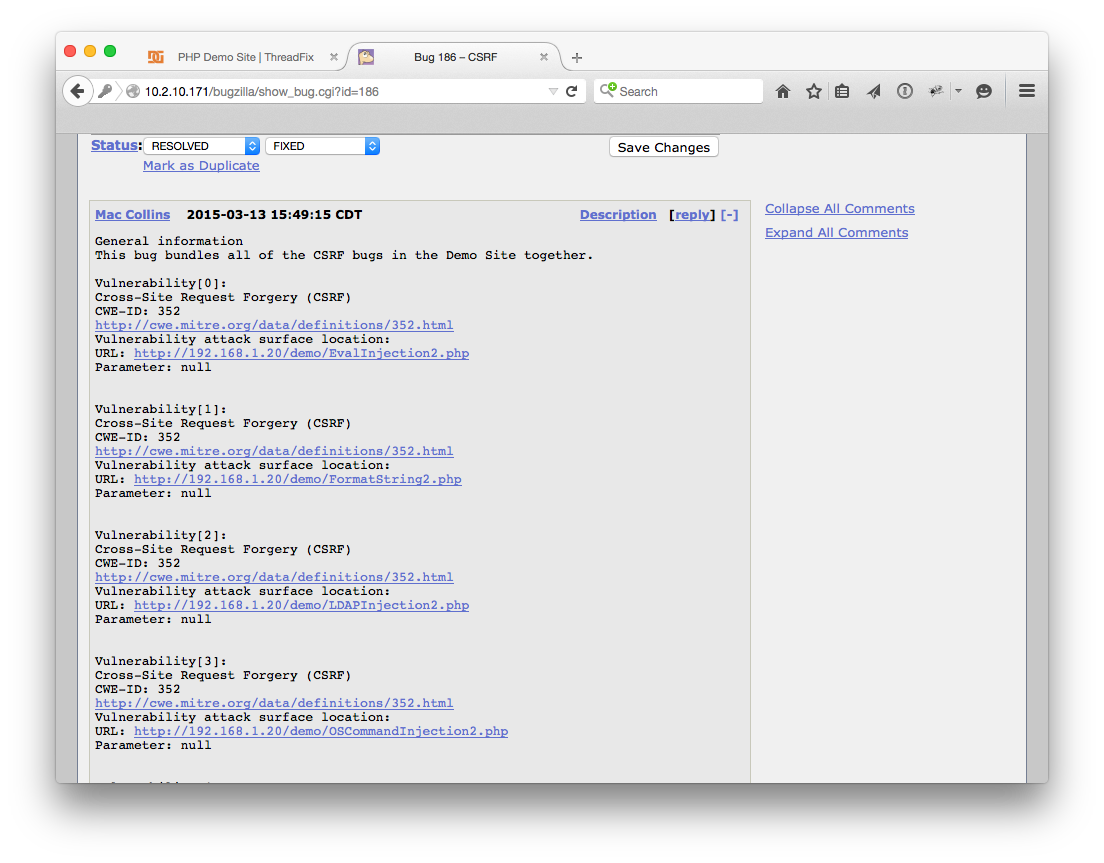 To import changes, click “Update Defect Status” from the Application page.
Once you've received the success message that "The Defect Tracker update request was submitted to the tracker" refresh the Application detail page. Scroll down and check the defect status for the vulnerabilities associated with the bug you just closed. Once the sync finishes, the “Marked closed by Tracker” field should be populated with a date.

That was a walkthrough of most of the basic functionality of ThreadFix. There were a few areas that weren’t shown:
- Reporting
- [ThreadFix REST interface] (https://github.com/denimgroup/threadfix/wiki/Threadfix-REST-Interface)
- [User management] (https://github.com/denimgroup/threadfix/wiki/Permission-System)